Are you looking for ways to expand your online presence and reach…
How To Create A Facebook Ads Manager Account For Ecommerce

If you are active and serious about growing your dropshipping business, Facebook ads are necessary. With over 3 billion active users in 2024, the platform offers endless advertising opportunities to help your business connect with your target audience.
You are about to learn everything about how to create a Facebook Ads Manager Account For your E-commerce business either on the Shopify e-commerce platform or another CMS.
But before that, there’s a catch: You must have a professionally created and well-organized Facebook business manager account to get ads running.
In today’s guide, I’ll break down the steps you need to follow to create a Facebook ad manager account and steps that many other successful drop shippers, including me, have followed and are still practicing.
In the process, I will share and sprinkle in some hard-earned data and insights from my own experience and journey to make the process easy and actionable for you.
This guide will help you create a new Facebook business manager account and Facebook ad account for your e-commerce business.
Table of Contents
Ideal Outcome
If done as guided, you will have an active business manager account ready to host all your Facebook assets and give your employees secure designated roles and access to your business manager.
You will have confirmed your payment method under billing, created your first Facebook ad account, and linked it to your Facebook page and other assets.
Why This is Important
With Facebook Business Manager, you can easily access multiple pages and ad accounts and make management seamless by assigning different roles to your team or agencies.
You will create multiple ad accounts for each business and be able to set up your first campaigns promoting your business to over 3 billion active Facebook users worldwide.
Why Creating a Facebook Ads Manager Account Matters
Imagine for a second that you have searched all your dropshipping life for a winning product and finally found success.
So you build a sleek and professional Shopify store using the $1 per month free trial, but you still need to include the one crucial aspect, one piece that would help you put bread on the table: effective advertising.
Start a free 3 Day trial and enjoy 3 months of Shopify for $1/month Instead of $39/month on selected plans. Sign up now
You start thinking of running Facebook ads, only to realize that managing multiple pages, different ad accounts, and multiple ads or campaigns is messy without a proper system and central management point.
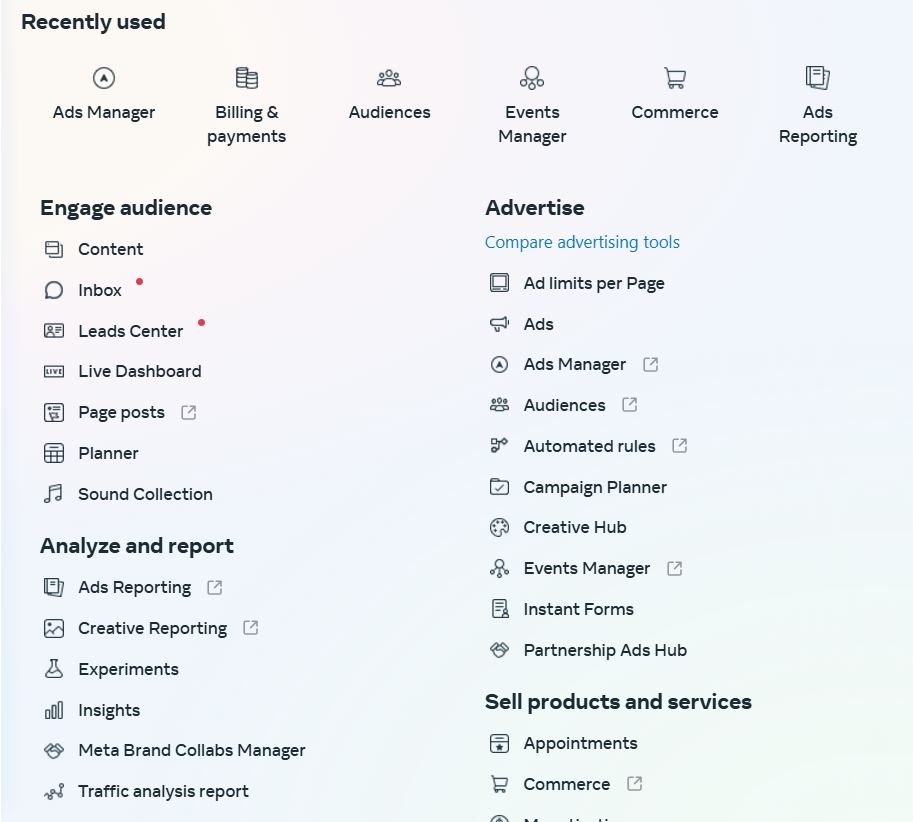
That’s why creating a business manager account is vital. This is your central hub for all your advertisement activities in Meta.
The business manager helps you in :
- Managing all your business pages, meta pixels, ad accounts, and Instagram accounts just by linking them in one section.
- Assigning different roles and giving access to your team and contractors based on their access level and the work they are obligated to do for the business, e.g., Advertisers, etc.,
- You get an in-depth campaign board and reports in one place, tailored to help the business make better decisions as ads run.
When I started running ads on Facebook, there was no business manager, so I struggled with failed payments, paused ads, and wasted a lot of time troubleshooting.
Now, with Facebook Business Manager, you can avoid making the same mistake I did.
Step 1: Setting Up Your Meta Business Manager
The first step is to create a meat business manager account. This process is easy and quick. You need to fill in a few personal information and get started.
Now, you need a professional business name. Unlike when I set up my first business manager, I used a casual business name and attached an outdated email. You can avoid this big mistake.
The client and your team will see these unprofessional details, which, in my case, hurt my business and credibility in general. It would help if you used short, branded business names.
Let’s get it right the first time.
How to Do It the Right Way
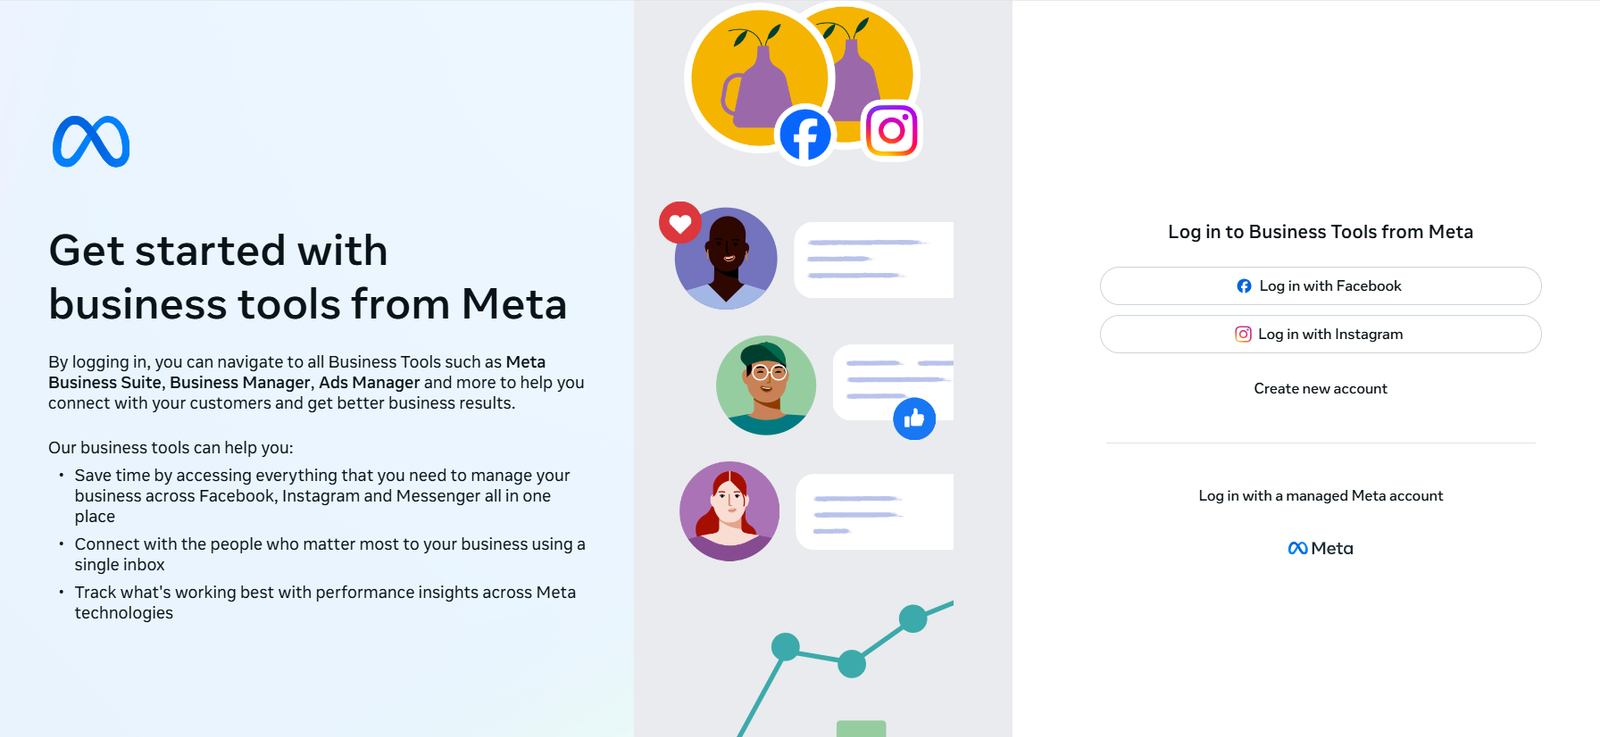
- Go to the Meta business manager link and select Create an account.
- Log in with your Facebook personal account if prompted.
- Enter your desired business name, name, and email (must be active).
- Click Submit and check your business email to verify your newly created account.
Step 2: Create a Facebook Ad Account For your Dropshipping Business
Now that you have created a Facebook business manager account and it is life, you need to create an ad account, which is used to create campaigns, ad sets, and ads for your dropshipping store.
You can also check and analyze your ad performances, control the ad budgets, and manage the entire campaign.
Why the Correct Currency Matters
You must choose the correct currency while setting up your ad account on Facebook.
Carl, one of my previous dropshipping clients, mistakenly selected the wrong currency while setting up their Facebook ad account.
This mistake led to conversion rate mismatches, billing issues, and other avoidable underlying metrics issues, which can be handled correctly if you set the correct currency from the initial setup stage.
Ensure you double-check your currency and align it with your timezone.
Step-by-Step Guide
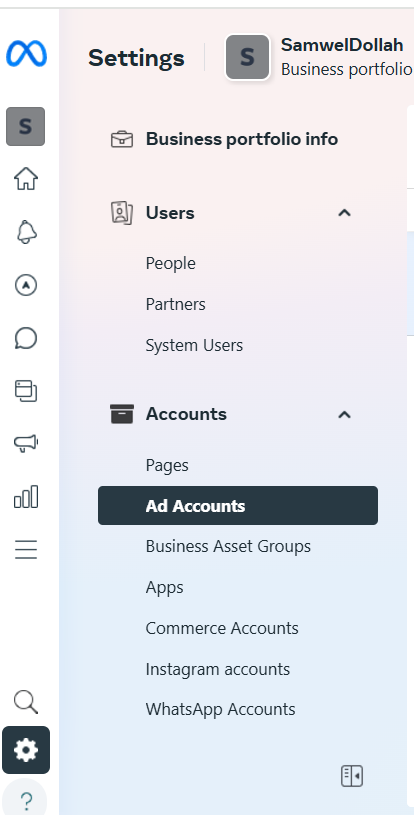
- Go to the ad accounts sections and click ‘ accounts ‘ in your business manager dashboard.
- Select ADD> Create a new ad account
- Enter your details, including your Ad account name, currency, and timezone.
- Indicate if the account is for your own business or acting on behalf of an agency for another business.
- Assign yourself to the manager role.
Step 3: Adding Payment Methods to Add Account
An ad account must have a payment method that is used for billing. Adding a payment method ensures that your ads and campaigns run smoothly without pause or interruptions due to a lack of billing. If this step is skipped, you risk having your campaigns paused.
Ensure the added payment method has enough funds to cover your ad spend.
How to Add a Payment method to an ad account
- Go to your Ad Account Settings > Payment Settings.
- Select Add Payment Method and choose the preferred payment option.
- Confirm your payment details and click save.
Pro Tip: Double-check your payment method details after running campaigns to avoid billing errors.
Facebook platform suspends ad manager accounts for repeated payment failure attempts.
Step 4: Double-Check Everything
Now that you have everything set up and complete, it is important that you;
- Ensure your currency and timezone are correct and accurate
- That your payment method is saved and active with funds
- Your business manager shows the proper Facebook ad account you created and outlines each role for your team.
My first experience with the ad account manager was when I had only $20 on the card.
After two days, I realized my ads were paused because my ad spend had exceeded my two-day daily budget of 10 each.
So, my ads were inactive, and I needed to be made aware. That mistake cost me hundreds in revenue.
Why This Matters for Dropshippers
The dropshipping business industry is competitive. To stay ahead and profitable, one needs the right advertisement tools, starting with correctly creating a Facebook ad account manager.
When set up the right way and optimized;
- You can launch multiple campaigns that target specific audiences based on interests, behaviors, and demographics.
- You can streamline your campaign workflows and focus on the ads that work as you scale your store.
- You’ll minimize and avoid campaign errors that could get your ad account banned, flagged, or suspended.
Next Steps: Launching Your First Ad Campaign
With the Business Manager you just created and an Ad Account ready, you can test, exploit, re, and run Facebook for your dropshipping business.
Next, I’ll show you how to craft your first ad on Business Manager, do audience targeting, budget, ad creatives guides, and tips tailored for the success of a dropshipping business.
Do you have questions or need more help? Comment below, and let’s get your store thriving!
How is your experience creating A Facebook Ads Manager Account?
Start Shopify For Only
Try Shopify free for 3 days, no credit card is required. By entering your email, you agree to receive marketing emails from Shopify.

