Do you want to know how to edit tags in Shopify? You…
How To Build A Shopify Store From Scratch (Updated)
Have you ever asked yourself how to build a Shopify store from scratch?
The time has finally come. You now understand how to select great products from great suppliers to help your business grow and make money. Following that, we’ll show you how to build a Shopify store from scratch
This is when we start building your store.
Shopify is a quick and simple way to create your website and start selling products. With the help of Shopify, you can add products, set shipping prices, and even change the look of your website.
So, how do you build a Shopify store from scratch?
Of course, I don’t expect you to make the ideal store overnight. I simply want you to start. As a new dropshipper, you may spend a significant amount of time there before determining what works. As previously stated, the formula should be to start small and learn and improve as you go.
So the first step is to build your ecommerce store. After mastering the fundamentals, you can start creating logos and advertisements.
We’ll go over each step to help you build a Shopify store in less than an hour. There are no drums and buzzers, just what you need to get started and increase your speed.
But first…
Step #1: Create a Store.
Choose a Name.
The name you choose is important, but don’t spend too much time on it.
Consider something that isn’t particularly important and that you can think of quickly. You could, for example, call your business “Petspaw Shop” or “The iPup Store.” If you own a pet supply business, that could work.
Because you will need to find an internet address, I believe you should add “store” or “shop” (domain). However, multiple words in the name make it easier to find one that meets your requirements.
The Business Name Generator is an excellent tool for creating a name for a dropshipping store.
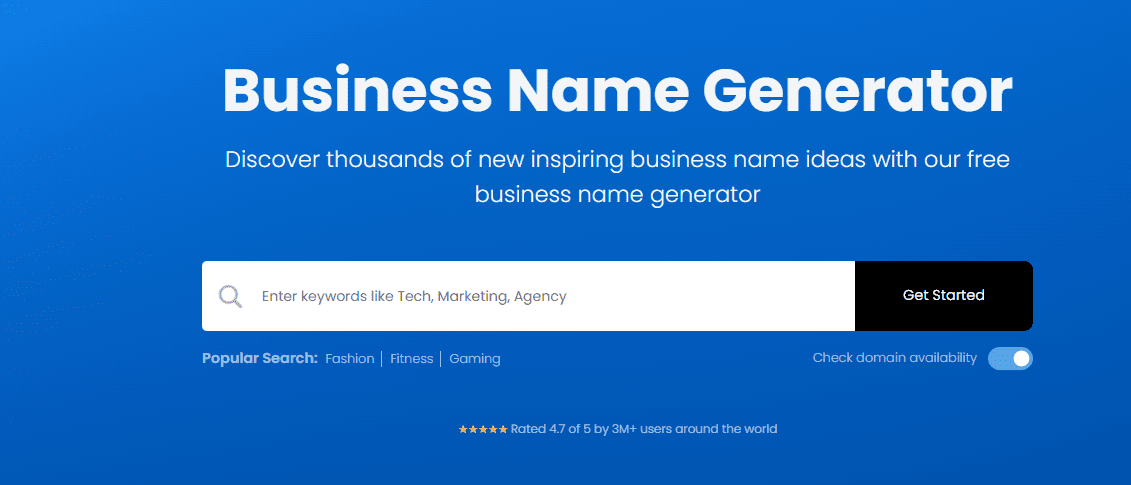
You can enter a word or two in your ecommerce store name, and it will add ideas for you.
Then all you have to do is scroll through the options and select the name you want for your business.
This business name generator is not only free but also extremely simple to use. So there’s one less thing to think about when you start your own business.
Additionally, make that your business has a dot com domain name that you can use. Why? “.com” has been a type of domain name since the beginning of the Internet. But on the other hand, most professional brands also use this type of domain.
Create a Shopify Account.
Shopify, which allows you to do this, enables you to set up an online store in just a few clicks. To accomplish this, first:
1. To start, Sign up on Shopify to get 14 day free trial. Then, you’ll see a pop-up asking if you already have a store. “No, I don’t have a store at the moment,” click. After that, you must click “Create your Shopify store.”
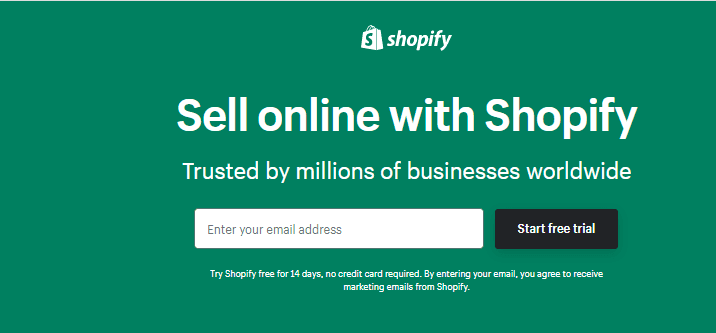
2. When you sign up, you will be directed to Shopify Click “Start a free trial” on the homepage to start a free trial. Make a password and a name for your business. Then, enter your email address and click “Create your store.”
Keep this window open, as well
Hack!
Because there are so many Shopify stores, the name of your favorite store may already be taken. However, don’t be concerned. Customers will never see this name again if you later buy a custom domain URL and connect it to your website. Maintain a professional tone.
Step 2: Configure Your settings
A few things must be in place for the store to function properly. First, make sure that everything is in order. To change your settings, go to “Settings” in the bottom left corner of your dashboard. The button with the gear icon is labeled “Settings.”
Before you do anything else, go to “General” and fill out all of your store’s information.
Set Up Taxes
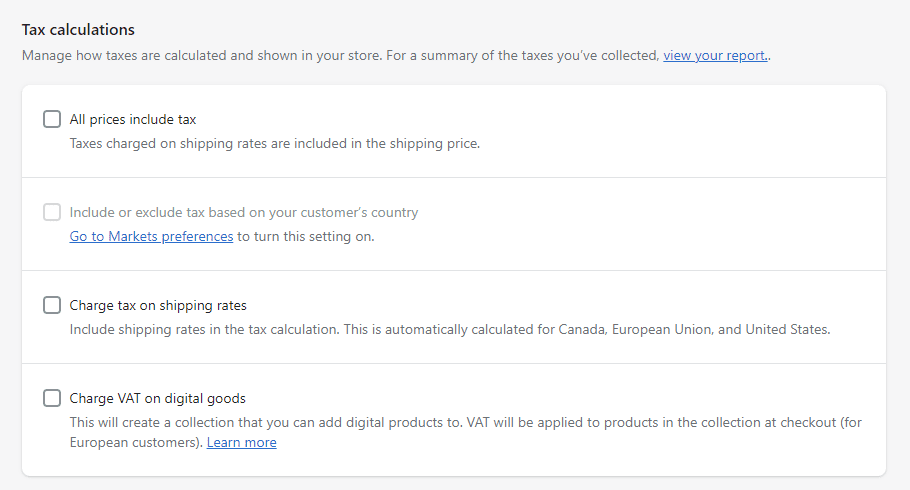
Then, to get to “Taxes,” click on that. You can choose whether you want to include taxes in your prices or if you want the customer to pay for taxes based on where they live. Of course, in the United States, this would be determined by where they live. This may be different if they live in another country.
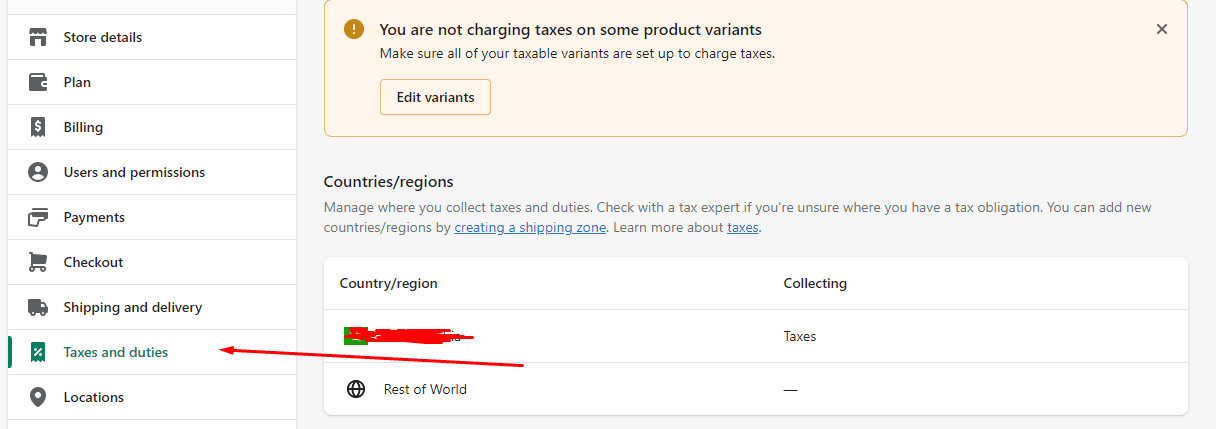
Most dropshippers include taxes in their prices. This is what most people do. This is usually what I recommend as well. This is what I typically do. Check the box and click “Save,” then go to “General” and fill out all of the information for your store.
Set Up Payments
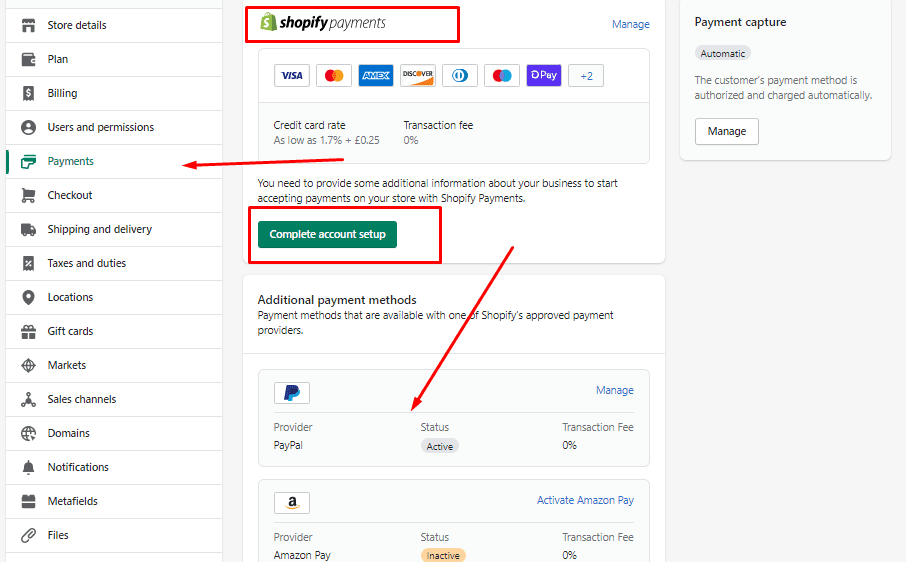
Use Shopify Payments and PayPal Express. People can use the two (for U.S. customers) to make payments. They make it simple for you to get paid. They’re also straightforward to set up.
Some of the other payment gateways can take a long time to set up and become operational. The first work is to collaborate with Shopify Payments. Return to the settings page and click “Payment providers.” To use Shopify Payments, click “Complete account setup” on the screen.
Fill in your name, address, and other data.
- Business details
- Personal details
- Product details (a brief description, such as “Women’s Fashion Accessories Store”).
- Customer billing statement-the way you want your company listed on the credit card transactions
- Banking information (bank account and routing numbers)
Counter-check everything to make it’s correct, then click “Complete account setup.”
After that, go to the “Payment providers” page and click the “Activate” button next to the PayPal section to set it up.
Go to the “Payment providers” page and click the “Activate” button to activate PayPal.
Then click the “Save” button, and you should be fine.
Set Up Checkout
Now let us set up the checkout process for your customers so they can buy from you.
Here are my frameworks for setting up a store for first-time store owners:
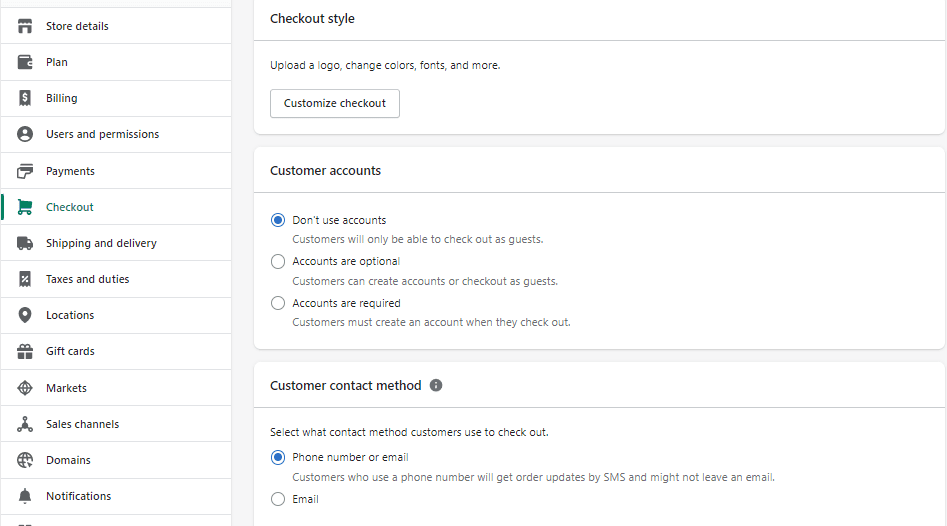
- Customer accounts ➜ Accounts are optional
- Customer contact
• Checkout: ➜Customers can only check out with an email address.
- Formal options
- Full name ➜ Require first and last name
- Company name ➜ Hidden
- Address line 2 ➜ Optional
• The shipping address and phone number must be given.
- Order processing
- While the customer is checking out
- Use the shipping address as the billing address by default
- Enable address autocompletion.
- After an order has been paid, do not automatically fulfill any of the order’s line items.
• If a customer has paid for an order, automatically archive the order.
- Email marketing At the checkout,➜ provide a sign-up option.
- Abandoned checkouts ➜ Send abandoned checkout emails automatically.
• Send out to anyone who abandons the checkout process.
• Send after 10 hours (recommended)
Remember, you’ll learn more about abandoned cart emails in Chapter 9, dedicated to them.
When you’re finished, hit the “Save” button.
Set up Shipping
Let us now talk about free shipping. Customers seem to like it, but is it the best option for your company?
To help you answer the question, I’ll go over a few scenarios where free shipping makes sense (and when it doesn’t) and why. We’ll also compare it to the free shipping and paid shipping thresholds.
As a business, when should you offer free shipping?
Calculated cost. You can take the trip because you’ve calculated the costs and determined that you can afford it. Dropshipping suppliers will occasionally offer the ePacket delivery service. It’s not free, but it’s a lot less expensive than other shipping options. So, for example, you could include the price of the eBay ePacket in the price of the item you sell and offer free shipping to your customers.
Staying competitive. If other brands in your industry offer free shipping, you should do the same. You should do this to stay on top of your game. As long as you do it, you may gain an advantage over others who do it.
Accommodating free shipping. You’ve changed the prices of your products so that they can now be shipped for free. If you must pay for shipping, you may include the cost of shipping in the cost of your product. For example, you can use Dsers to combine the prices of goods and shipping costs into a single price. This will help you make money while preventing your customers from being surprised by the price.
Sticker shock: Shock or dismay; it can be very upset when people discover that a product costs more than anticipated.
When you don’t want to offer free shipping (You should not).
You’re attempting to raise the average order value (AOV). AOV, or average order value, calculates how much customers spend on your website on average. It shows how much they spend on average. So when you’re trying to make more money, you’ll still offer free shipping, but here’s the catch.
The customer must spend a certain amount of money before receiving free shipping from the store. The most common thresholds are $25, $35, $50, and $100, but they can be any amount.
When shipping costs are prohibitively high, we are unable to send items. You should also offer free shipping if the shipping costs are prohibitively high. For example, if a product is delivered in seven days, “express shipping” raises the cost.
Guru-inspired Insight
Friends Doug Zachariuk and Kory Szostak are dropshipping specialists who made around $350,000 nine months after opening their fantasy gaming store. They’ve known each other for many years. They achieved excellent results as a result of a shipping threshold.
They had a “free shipping if you spend $50” offer and saw a significant increase in average order value.
Before that, the average order value was $12-14, but it is now around $35-40. This is a significant change. You don’t have to catch your breath until your next sale as long as you make that money.
Is it better to offer free shipping, a free shipping threshold, or free plus shipping?
And the best way to find out is to explore all three methods in your store. It is possible to try one method for a few weeks and then compare it to another shortly after.
Assume you offer free shipping for a month on all of your products so that people can try them out. The following month, you can switch to free shipping on orders over $35 for the entire year.
Compare the amount of money you made in the first month to the amount you made in the second. For example, if you own a store, this should give you decide on a shipping method.
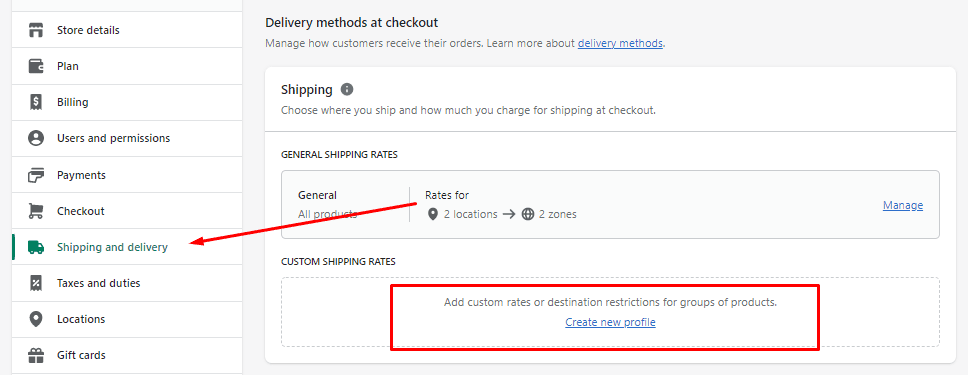
Setting Up Shipping in Shopify
“Shipping origin” is a Shopify field that must be filled out. This field should be filled out with your business address (which is probably also your home address unless you rent a mailbox).
But don’t worry, when we change the settings, customers will no longer see this.
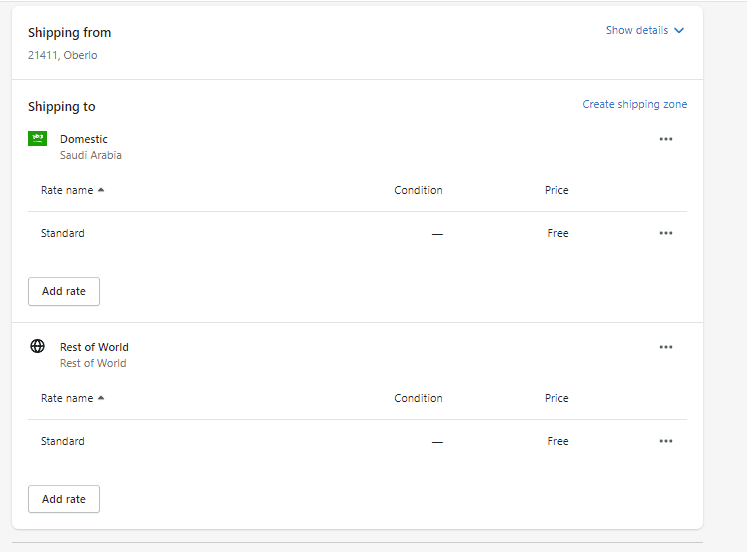
Delete any previously set shipping zones. Change the zones that have already been created by clicking “Edit” next to them.
To remove a zone from the shipping map, click “Delete shipping zone” and then “Delete zone” in the confirmation window.
Repeat for all of them. There are usually two of them: one for “Domestic” and one for “the rest of the world,” yet there are generally more.
When all is clear, click “Add shipping zone.”
If you’re offering free shipping, just type it in the text box below. Unfortunately, customers are unable to see this sign.
After adding the countries you want to send your package to, click “Save.” If you don’t mind paying for shipping to other places, simply add “Rest of the World” to your shopping list.
Navigate to the “Add rate” button in the “Price-based rates” section.
If you want to include shipping in the price of your items, select “Free shipping rate” here. Instead, you can add a flat rate here to charge customers for shipping. For example, “Flat rate shipping for $2” would be a good name for this option.
Then click “Done.”
When you’re set, don’t forget to click “Save.”
Create Policy Pages
At the start of your project, you must make at least four important legal pages.
- Privacy Policy
- Refund Policy
- Terms of Service
- Shipping Policy
“Sales Channels” – Online Store – “Pages.” Go to the pages to find out how to make them. When you get to the top, click “Add a page.”
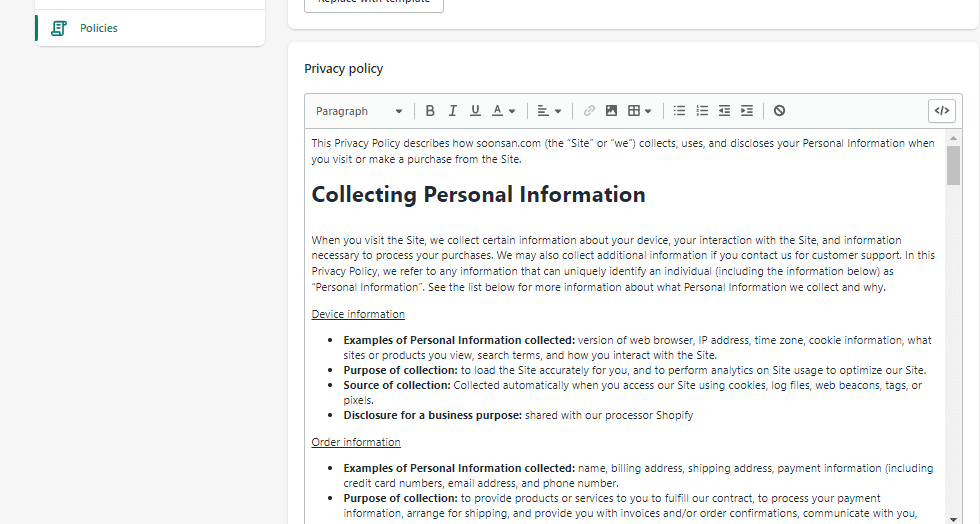
Let’s go over each page one by one. This is what you should do:
Create a Privacy Policy page
You must make that you have a solid Privacy Policy in place, particularly in light of the new GDPR rules in Europe.
If you don’t want to write your privacy policy, Shopify has a tool that will do it for you.
Simply go to the Privacy Policy Generator page to make your policy.
1. Click the “Get Started” button.
2. fill in your company information and website address, and then click “Send me my privacy policy” to receive your policy.
3. Complete! Simple.
Shopify will send you an email. Then, check your email for an email from them. Make a note of the link to your policy from the page you’re on.
Then, just like we did for you before, add a new page. The title of your page will be Privacy Policy. Then, copy and paste the Shopify privacy policy that came with your page title into your new page.
People who work for Shopify will put text in brackets on their website. These brackets are provided to make you customize your policy. After reading each one, choose what to do based on your store.
You can simply delete some bracket items if they do not apply to you, such as if you do not use them. When you’re finished with the project, make sure there aren’t any more of those unsightly brackets.
Make sure you read every word and that it is appropriate for your business. This can be used as a guide, but it is not definitive.
When you click “Save,” your page will be up and running.
Create a Refund Policy page
Shopify also has a page where you can create a refund policy. Click here to fill in your information and have a template page emailed to you in the same manner as before.
Again, before you do this, read every word and make sure it all applies to your store. Then, just as you did with the privacy page, you should publish the page.
Create a Terms of Service Page.
Shopify comes to the rescue once more, this time with a generator. Click here to make a free template for a “Terms of Service” (also known as “Terms and Conditions”) page.
It’s good to go over each word and make necessary changes before re-posting it.
Create a Shipping Policy page
Customers may have to wait longer for their products to arrive, given the dropshipping logistics, but it can take up to 60 days in some cases.
But don’t panic; this isn’t always the case, and you can avoid it by carefully selecting your suppliers.
However, having a shipping page is a good idea to let your customers know how long it may take for their order to arrive. Also, if any customers complain that you didn’t give them about the shipping times, you’ll have something to fall back on.
If you have a shipping page, it should include the following information:
Shipping costs: Discuss shipping costs as they apply to various getting things to and from you. It is worth noting that free shipping is a significant benefit for the company. It could be used to explain why shipping times are longer. It’s something to consider.
Shipping and handling times: How long does each shipping method take to arrive at your home or office? Customer: How long should a customer expect to wait between placing an order and receiving their item?
Shipping options: the various shipping options you provide, including things like standard shipping, international and domestic shipping, and so on.
Restrictions: Are there any rules you must follow when shipping things? The same thing would happen if you didn’t ship to certain states, countries, P.O. boxes, and so on.
And, of course, make this page in the same fashion as all the others before.
As with any other Shopify page, you must add these to your website’s header or footer so that customers can access them without clicking on a direct link. Otherwise, they won’t be able to get there.
Now, add these four to the page’s footer.
Visit “Sales Channels,” then “Online Store,” and then “Navigation.” and learn how to use the site.
• Navigate to the “Footer menu” and then click it.
• Next, select “Add menu item.”
• After then, type the page’s name in the footer precisely as you want it to appear.
• Navigate to “Link” ➜ “Pages.”
• Find the relevant corresponding page. After that, click “Add.”
•.After that, repeat the process till you’ve added all four pages to the list.
Don’t forget to click the “Save Menu” button at the bottom of the screen. You don’t have to think about anything else.
And you’ve set configuring the settings! This is the last thing.
Step 3: Add Products and Content
You must first customize products from your Dsers Import List before they can be imported into your store. You can give them unique names, descriptions, photos, and other details, such as assigning them to a collection or adding tags. But first, watch this video
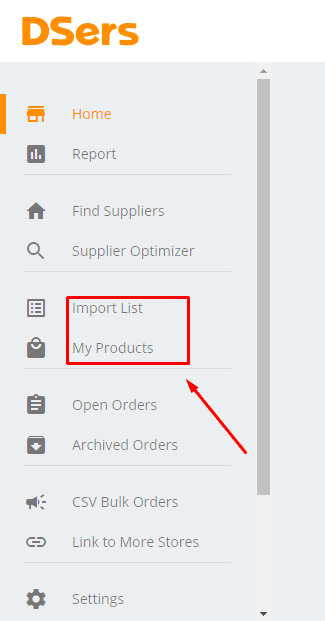
You can contend with me when I say that importing first and then customizing changes take time. Consider this:
This video will demonstrate how the Dsers Import List functions and what you should do before clicking the “Import to Store” button.
Not only are your products important, but so is the content you use to customize them. As you test and improve your store, this is an area that you should pay close attention to in the future.
If your products cannot be touched or held by other people, proceed with caution. So the only way to show them how great they are is to write content that piques their interest.
Here are some pointers on how to customize these items:
• Description
• Images
• Price and Inventory
Product Description
The product description’s goal is to make the customer buy the product right away.
Address yourself to the following data points to pique your customer interest:
- What is the problem that your product addresses for your customer?
- What benefits does your customer obtain from using your product?
- It is essential to understand what differentiates your products from the competition.
Make sure that your brief description answers these questions clearly and concisely.
If you write your product description casually and positively, it will stand out even more. You’re not writing a thesis but rather a description of your product that will make your customer buy from you.
Hack!
When writing a product description, break information into short, easy-to-read chunks. Bullet points and headings are just two examples of things that can help make this happen.
It is expensive to hire a copywriter, that is why I recommend using AI copywriting tool which is 99% efficient and on point, checkout copygenius.io (Good for starting on a small budget) or Jasper.ai (which requires a big budget).
Product Images
While I believe that taking your product photos is important, you don’t have to do it all of the time if you’re dropshipping. When dropshipping suppliers list their items, they frequently include good product photos.
You can only go so far if you use other people’s photos. Ordering samples and taking your photos is the best way to be in control of your brand. This ensures that your photos have the same look and feel, greatly benefiting your brand.
You can take photos of a range of products. The following product images are trendy.
- Lifestyle: Encourages people to envision and consider how they might use your product in real life.
- Group: Other items, such as a smartphone case, are included in the group and complement the original.
- Plain Background: If your background is simple, people will be able to see all of the details and the actual color of your product.
If you’re selling a well-known product, you might not need to order a sample for testing. This is due to the possibility that you will be able to find images of products suitable for your project on a stock photography product.
Check out free stock photography websites like these.
- Unsplash
- Shopify’s Burst
- Pxfuel
Hack!
It’s also good to include your videos on your product pages.
Product pricing & Inventory
In the Pricing section of Shopify, there are three fields. These are the individuals:
- Price
- Compare at prices
- Item costing
The second field is for informing people that an item is on sale. When you write about a product, include the price you paid for it and the price it is currently on sale.
Hack!
Don’t simply set a price and then ignore it. Instead, you must ensure that you can pay your bills while also earning a living. Learn more about how to check money by reading this pricing strategies article.
You can also tell Shopify that you want to keep track of your products Inventory. Then, select the “Track quantity” checkbox and enter the number of items you want to keep track of for sale.
People will not be able to order orders with you until you have received good enough products from your suppliers.
Hack!
To create an effective product page, you must be both an artist and a scientist. So why did we write an entire guide to it? To learn more about creating your pages, check The Ultimate Guide to Building Powerful Product Pages.
Step #4: Create Your Layout in
Are you still around! Layout and design take up a lot of time. These are the final steps that you ought to involve in.
However, there is one good thing: Shopify automatically selects a theme for your ecommerce store. On top of that, you can make a pretty website with your banner image, color scheme, and other eye-catching design features. In Chapter 6, we’ll show how to render this stuff.
Meanwhile, let’s get started on the layout. Then you’ll need to create a few menus and make a few changes to make it look tidier.
Main Menu
The main menu is visible on all of the site’s pages that you have created. It is typically displayed as a list of items across the top of the page or in the sidebar. People will usually look at your main menu to find more about your store.

To create the main menu, implement these steps:
- Go to your Shopify account and log in.
- From the Shopify admin area, click “Online Store.”
- Then, to create a new menu, go to “Navigation”> “Add menu.”
- Create the title “Main Menu” in your text editor.
- Add items such as “Home,” “Catalog,” “FAQ,” and “Collections” near the top of the menu bar.
- Finally, click “Save Menu.”
Footer Menu
The footer menu appears at the bottom of your website. People are likely to look at it to find more about your contact information and store policies.
Footer: How to create It:
- Go to your Shopify account and log in.
- From the Shopify admin area, click “Online Store.”
- Then, to create a new menu, go to “Navigation”> “Add menu.”
- Write the title text “Footer menu.”
- Add items such as “Privacy Policy” and “Contact Us” to the Footer menu so that people can see them.
- Finally, click “Save Menu.”
Editing Featured Products
You can select a collection of products to show by going to Themes > Customize > Featured Products.
If you create a collection in the same way you did before, you can highlight one of them by labeling it “Featured.”
When you add a new product that you want to highlight, you should include the “Featured” tag, which will appear under “Featured” on the home page.
Read Also:
- How To Choose Products And Suppliers For Dropshipping (2022)
- How To Select Niche Markets For Dropshipping Store In (2022)
- How To Create Product Pages That Convert Into Sales 2022
- 10 Easy Secrets To Selling On Poshmark As A beginner In 2022
- A Look At The Wholesale Intermediary Business Model In 2022
Step #5: And The Store Is Now Open For Business!
Your store’s first version should be perfectly adequate for you to go live.
Hack!
Only a paid Shopify account will enable you to go live. If you haven’t already utilized your two-week free trial, now is the time to do so.
Proceed to your Shopify dashboard’s “Settings” and “Account” sections to upgrade. If you’re entirely new to all of this, starting with the $29 monthly plan is good.

How much work goes into creating a store, and how simple it is to get it up and running. It only takes a few mouse clicks to accomplish this.
You’ll find Sales Channels, an Online Store, and Themes on the left side of the page.
A “Disable password” button will appear on the screen; click it.
“On the next screen, uncheck the “Enable password” box, then click “Save” to save your changes.
You should notice a sign indicating that your store is now open. Click “View store” to see all of your efforts.
The good news is that you’ve recently launched your first dropshipping store.
Even though it didn’t take long, it’s a huge accomplishment. You can now call yourself an ecommerce entrepreneur because you have your online store that you are successfully running.
Start Shopify For Only $1 A Month
Sign Up For A Free Trial and enjoy 3 months of Shopify for $1/month on select plans.
Try Shopify free for 3 days, no credit card is required. By entering your email, you agree to receive marketing emails from Shopify.



Comments (0)