If you are looking for Shopify website builders, you’re obviously trying to…
How To Customize Shopify Checkout Page Using Checkout Editor
Are you looking for a way to enhance your customer’s shopping experience and boost your conversion rates? Look no further than Shopify’s Checkout Editor!
This powerful tool allows you to customize your checkout page to provide customers with a seamless, branded experience.
However, to access the full range of features Checkout Editor offers, you’ll need to upgrade to Checkout Extensibility and Shopify Plus plans.
Take the opportunity to take your e-commerce store to the next level. Instead, upgrade today and start using Checkout Editor to create a checkout page that your customers won’t forget!
What is Checkout Editor?
If you’re unfamiliar with Checkout Editor, it’s a powerful tool offered by Shopify that lets you customize your checkout page. This allows you to create a seamless, branded customer experience and improve your conversion rate.
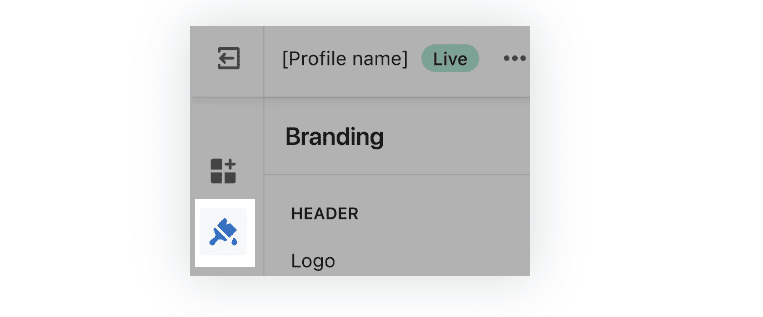
With Checkout Editor, you can modify the design and layout of your checkout page to match your brand’s aesthetic and ensure a consistent shopping experience.
You can also add or remove fields to gather the information you need from your customers. Overall, Checkout Editor provides an easy and efficient way to make your checkout page work better for you and your customers.
Why is Checkout Editor Important for Your Business?
Your checkout page is one of the most critical parts of your online store, and it’s where your customers decide to purchase. That’s why ensuring the checkout process is as smooth and hassle-free as possible is essential. Here are some reasons why Checkout Editor is essential for your business:
- Customization: With Checkout Editor, you can customize your checkout page to match your brand’s look and feel. This allows you to provide customers with a seamless, branded experience and builds trust in your brand.
- Increased Conversion Rate: A well-designed checkout page can help reduce cart abandonment rates and increase your conversion rate. With Checkout Editor, you can create a checkout process that is simple, intuitive, and easy to use, which can lead to more completed purchases.
- Data Collection: Checkout Editor allows you to add or remove fields from your checkout page to collect the information you need from your customers. This can help you gain valuable insights into your customers’ behavior and preferences, which can inform your future marketing strategies.
- Flexibility: With Checkout Editor, you can quickly and easily change your checkout page. This allows you to test different layouts, designs, and fields to see what works best for your business and customers.
Checkout Editor is essential for any online business looking to improve its checkout process and increase its conversion rates. Its customization options, data collection capabilities, and flexibility make it a must-have for any serious e-commerce store.
How to Use Checkout Editor?
Using Checkout Editor is a straightforward process that involves a few simple steps. Here’s how to get started:
- Upgrade to Checkout Extensibility and Shopify Plus plan: To use Checkout Editor, you’ll need to upgrade to Checkout Extensibility and Shopify Plus plan. This will give you access to all the features, and customization options Checkout Editor offers.
- Access Checkout Editor: Once you’ve upgraded, you can access Checkout Editor by going to your Shopify dashboard and clicking on the “Settings” tab. From there, select “Checkout” and then “Customize Checkout.”
- Customize Your Checkout Page: Once in Checkout Editor, you can begin customizing your page. You can change your checkout page’s layout, design, and color scheme to match your brand’s aesthetic. You can also add or remove fields to collect the information you need from your customers.
- Preview Your Changes: Before you publish your changes, you can preview them to see how they’ll look to your customers. This allows you to make any necessary adjustments and ensure that your checkout page looks and functions exactly as you want.
- Publish Your Changes: Once you’re happy with your changes, you can publish them to your live checkout page. This will make your customized checkout page available to your customers, providing them with a seamless and branded shopping experience.
In sum, using Checkout Editor is a simple and intuitive process that allows you to customize your checkout page to match your brand’s aesthetic and improve your conversion rates. With a few clicks, you can create a checkout page that provides your customers a seamless and hassle-free shopping experience.
Read Also:
- Can You Make Money With Shopify? ( 15 Best Ways)
- Is Shopify The Same As Amazon? (Major Differences) 2023
- 15 Reasons Merchants Prefer Shopify To Wix
- How To Create TikTok Video Ads For Dropshipping Business 2023
- How To Create A Stripe Account As A Non-US Resident (2023)
Best Practices for Using Checkout Editor
Customizing your checkout page using Checkout Editor is a powerful way to optimize your e-commerce store for increased conversions and customer satisfaction. However, there are a few best practices you should keep in mind to make the most out of this tool:
- Please keep it simple: While adding lots of fields and options to your checkout page can be tempting, keep in mind that simplicity is often vital. Only collect the information you need, and keep the layout clean and uncluttered to avoid overwhelming your customers.
- Brand it: Your checkout page should be an extension of your brand’s aesthetic, so use your logo, colors, and fonts consistently throughout the page. This will help build customer trust and create a more cohesive shopping experience.
- Be transparent: Customers appreciate transparency, so clearly explain any additional fees, shipping costs, or taxes they may encounter during the checkout process. This will help avoid confusion and build trust with your customers.
- Optimize for mobile: With more and more customers shopping on their mobile devices, it’s necessary to ensure your checkout page is optimized for smaller screens. Keep the layout simple and easy to navigate, and test your checkout page on different devices to ensure it’s functioning correctly.
- Test and iterate: Finally, don’t be afraid to experiment with different layouts and designs for your checkout page. Use A/B testing to compare different versions, see which ones perform better, and adjust accordingly.
With these best practices, you can use Checkout Editor to create a checkout page that looks great, improves your conversion rates, and provides your customers with a seamless and enjoyable shopping experience.
Final Thoughts
In conclusion, Checkout Editor is an essential tool for any business looking to improve their checkout page and increase their conversion rates.
Upgrading to Checkout Extensibility and having a Shopify Plus plan allows you to customize your checkout page to match your brand and offer your customers a seamless checkout experience.
With this guide, you now understand Checkout Editor, why it’s indispensable for your business, how to use it, and the best practices for optimizing your checkout page.
By following these tips and utilizing Checkout Editor to its fullest potential, you can take your e-commerce business to the next level. So, don’t hesitate to upgrade to Checkout Extensibility and start customizing your checkout page today!
Start Shopify For Only
Try Shopify free for 3 days, no credit card is required. By entering your email, you agree to receive marketing emails from Shopify.
FAQs
FAQs on Using Checkout Editor and Checkout Extensibility
What is Checkout Editor?
Checkout Editor is a powerful tool that allows you to customize your checkout page to improve your customer’s experience and increase conversion rates.
Do I need to upgrade to Checkout Extensibility to use Checkout Editor?
Yes, you need to upgrade to Checkout Extensibility and have a Shopify Plus plan to access Checkout Editor.
How do I upgrade to Checkout Extensibility and Shopify Plus?
You can contact Shopify’s support team to request an upgrade to your plan.
Is it difficult to use Checkout Editor?
No, Checkout Editor is a user-friendly tool that allows you to customize your checkout page without coding knowledge easily.
Can I use Checkout Editor to add custom fields to my checkout page?
Yes, you can add custom fields to collect additional information from your customers during checkout.
How do I ensure my checkout page is optimized for mobile devices?
You can use the preview function in Checkout Editor to see how your checkout page looks on different devices. You can also use a responsive design to ensure your checkout page automatically adjusts to different screen sizes.
Can I test different versions of my checkout page with Checkout Editor?
Yes, you can use A/B testing to compare different versions of your checkout page and see which one performs better. This can help you make data-driven decisions to optimize your checkout page and improve conversion rates.

Comments (0)