Are you interested in selling print-on-demand products through Shopify and Printful? Procuring products for an online store is a challenge.
On the other hand, the print-on-demand (POD) trend streamlines and accelerates the process by eliminating the need to mass produce and store products before their sale.
Table of Contents
Our in-depth guide will show you how to integrate Printful and Shopify to open your print-on-demand store, which is a fantastic way to make money online.
The Shopify-Printful Basics
Together, Shopify and Printful form the best print-on-demand and online ecommerce systems.
To get you ready for the tutorial, we’ll go over the fundamentals of Shopify and Printful, including how they’re similar and how they work together to create this print-on-demand system.
Shopify
Shopify is a hosted ecommerce platform that includes various features for creating a website, selling goods, and processing customer payments.
It has everything you need to create and manage a website for selling goods online, including tools for taking payments, promoting your store, and monitoring your customers’ buying habits.
In our experience, Shopify is the best option for any size business, from a one-person operation to a multinational conglomerate looking to open an online store.
Bring your business ideas to life for $1/month On the Shopify Platform. Click the Image Below.

Shopify has monthly plans starting at $39 and going as high as $399. In contrast, the $5/month plan does not furnish you with a fully functional online store but rather with buttons to be integrated into an existing website.
You should spring for Shopify’s $105/month plan if you’re running a legitimate online store. If you have a less complex store, consider Shopify’s Basic plan for $39.
For more information on Shopify’s pricing, please consult our detailed guide.
To put it simply, Shopify is your storefront for your print-on-demand business. Then, you’d pair it with an app that provides POD services and sell those items through your Shopify store.
Considering its popularity as a POD solution in the Shopify App Store and its smooth integration with the platform, we can’t think of a better recommendation than Printful.
Printful
You can think of Printful as an independent company from Shopify. It is a different business altogether that provides print-on-demand services and associated products.
In this business model, you create your goods (such as t-shirts, mugs, and hats), list them on your website (via Shopify), and only print and ship them to customers when they make a purchase.
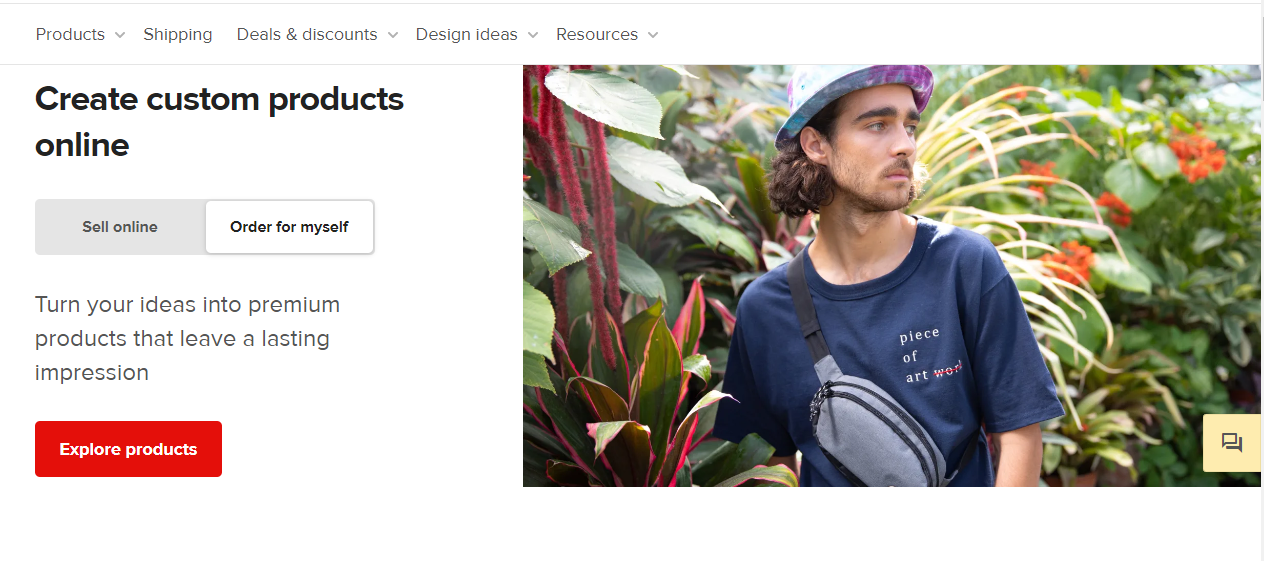
Printful provides an app that syncs your products with Shopify and has a dashboard where you can manage everything from product designs to your margins.
Printful prints and ships your products for you, a variation on the traditional “dropshipping” model in which the vendor keeps your inventory and sends it out only when an order is placed. Initial investments, shipping, and storage costs are reduced as a result.
When you use Printful, it won’t cost you a dime. Printful only gets paid when one of your items sells. While the unit price is higher than if you bought bulk and stored the goods, you still save money.
To get an idea of how much you can expect to spend, let’s say that you decide to make a custom t-shirt through Printful that costs $9. Yet, you are free to set your prices for consumers. This shirt, if sold for $20, would net you a profit of $11.
You’ll also have to pay for Printful’s storage and fulfillment program if you want to store and ship products that weren’t created by Printful, as well as for any sample products you order (at a discount, of course).
Remember that you have other options besides Printful if you want to sell POD products on Shopify. For more services like Spocket and Printful, view our article on the top print-on-demand Shopify apps.
Concerning international sales, Printful’s global fulfillment service is just as attractive as its user-friendly design interface and competitive pricing structure.
The company operates distribution centers in the United States, Canada, Spain, and Latvia. The majority of Europe, Eastern Europe, and some of Asia can be reached through Latvian and Spanish data centers.
In addition, orders are fulfilled automatically, products come in white-label packaging, and you can check customer reviews to see if they are satisfied with the quality of what you are selling. As was also mentioned, you can perform trials before making any products.
Creating Your Online Store With Shopify
Creating your online shop on Shopify is the first thing you should do. Your store’s theme and payment processing should be activated at the very least before you connect it to Printful, but you can skip over the rest if you like.
Sign up for a free trial and enjoy 3 months of Shopify for $1/month on Select Plans.
This Shopify guide will give you an in-depth analysis of the platform and its features for creating an online store.
So that you can get started right away, here is a condensed version:
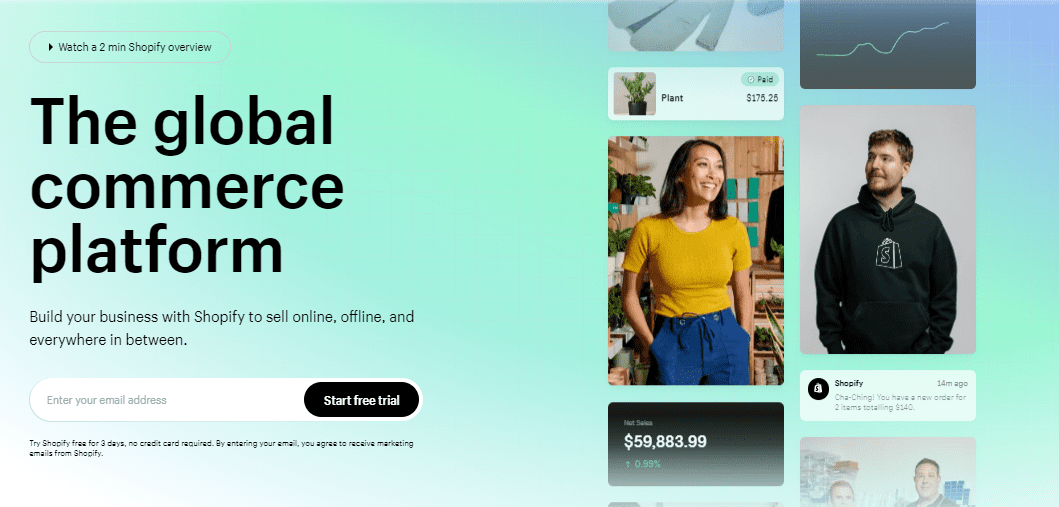
To get started, visit Shopify’s website and enter your email address in the appropriate field. To begin your no-risk trial, to get started too, click the image below.
Getting to your dashboard will require you to answer a few registration questions. However, once your free Shopify trial ends, you won’t be asked for a credit card number. Instead, you can create a website in this way without spending any money.
After you’ve answered the preliminary questions, it’s time to explore the dashboard and become familiar with its features.
The navigation bar features links to different sections, such as those for viewing orders, browsing products, and checking out customer profiles, as well as sections for analyzing data, getting deals, and promoting the business.
Putting in a Shopify theme will immediately make your site look more professional. Additionally, we’d like to customize the theme to your brand’s specific needs.
Use the ‘Online Store’ link in the main navigation to get started.
Your control dashboard may be set up with a default theme. In that case, if the Customize button suits your needs, go ahead and use it.
Keep scrolling down and click on Explore Free Themes or Visit Theme Store to check out the other available themes.
The free themes in the control panel are a great way to have a professional look for no cost. You may check out, choose, and install any of these themes from this pop-up window for your online store.
However, if you head to the Shopify Theme Store, you’ll find a large selection of premium themes, which cost between $50 and $100. (one-time fee).
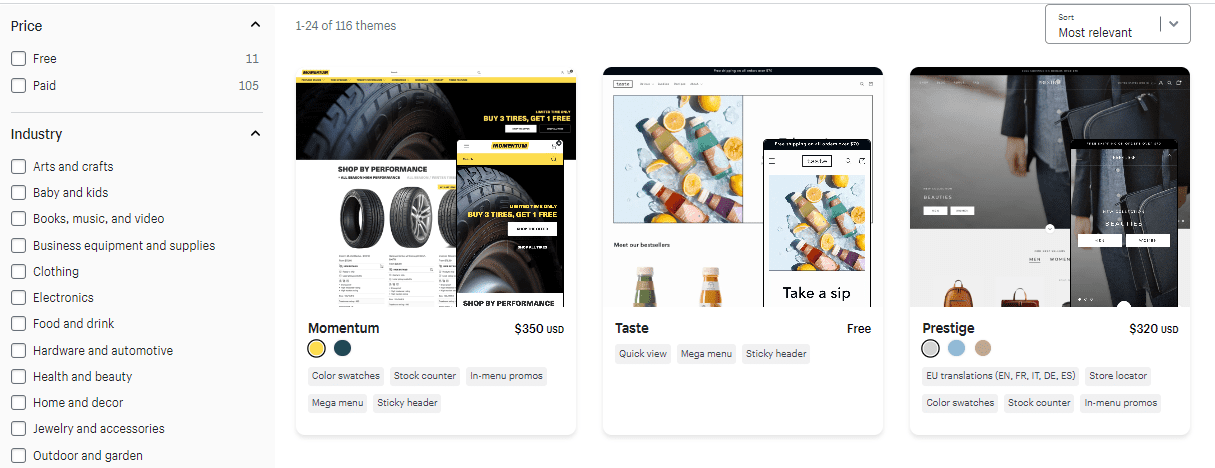
The pages in Shopify will be visible once a theme is activated. You can now use the theme’s Customize button to modify its appearance (such as its logo, color scheme, and homepage layout).
Shopify’s front-end editor visually represents your site as it appears to visitors. While it lacks a complete drag-and-drop builder, the editor does offer a few movable modules on the left that may be used to insert content blocks and rearrange their placement on the homepage and other pages.
To change the settings for a particular content block, click on it. There’s room for expansion if you use building materials that weren’t provided by default.
Pictures, movies, and articles are just some of the content that may be found in these blocks.
Shopify’s Header block, for instance, lets you specify things like your site’s favicon and header space in addition to uploading a logo.
It is highly recommended that you review each content module individually to check for proper layout and functionality.
The next step is to return to the control panel and set up your payment methods.
All of your billing information may be found in the Settings menu. For example, the dashboard’s Settings button may be in the bottom left-hand corner.
Select the Payments option and continue.
Shopify Payments is one of several available payment methods and is the most cost-effective. To begin accepting payments through Shopify, activate the feature and enter your banking details.
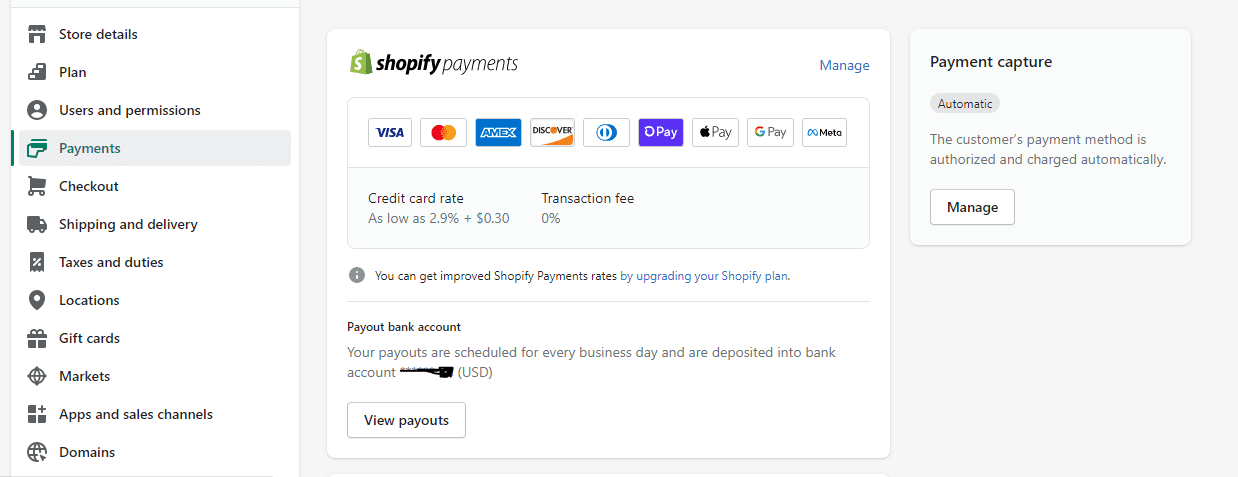
If you want to provide your customers with additional payment options, you can use services like PayPal and Amazon Pay.
There’s also a link to click if you find a third-party service that’s more affordable or more dependable in your area.
Those are the main features of Shopify that need to be configured. There’s much more to it than that, so we recommend exploring the dashboard to find the best settings. Further information can be found in the referenced guide.
Connecting Printful with Shopify
That Shopify store of yours is either finished or nearly finished. Putting together Printful and Shopify is something you should get familiar with now.
Thanks to the $1 monthly Shopify offer, you won’t have to worry about paying Printful during that time.
Since you will create your products on Printful and sell them on Shopify, connecting the two platforms is necessary for seamless product syncing.
As a result, we’ll need a method to list the products on your Shopify store and then have orders forwarded to Printful.
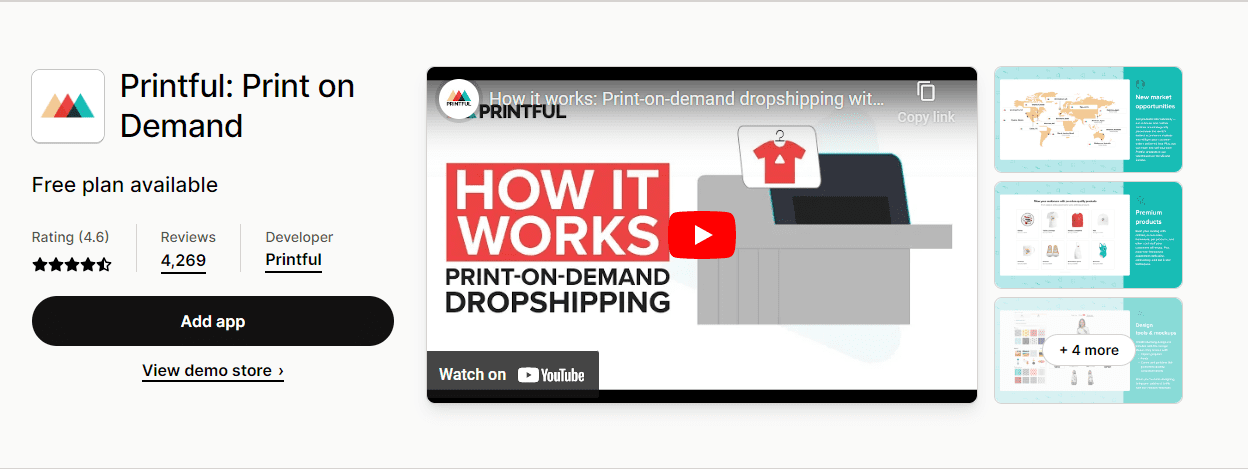
Click the Apps tab on the Shopify menu to complete the integration.
To access the Shopify App Store, click the Shop For Apps link.
You can locate the rest of the App Store in search of other business-related apps. Other POD apps may also provide printable products, so we suggest exploring them there.
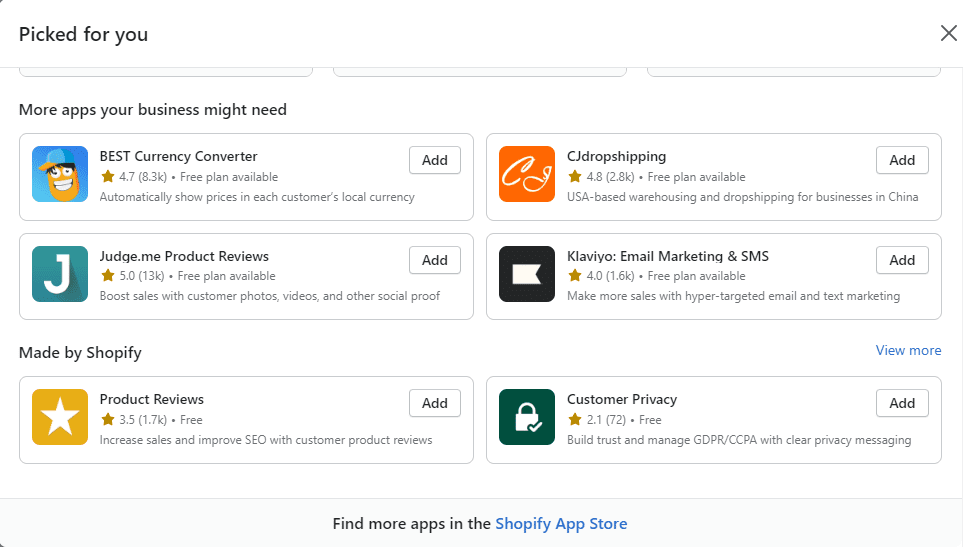
Printful, on the other hand, has a lot going for it, including, most importantly, its quality assurance, speed of delivery, and competitive pricing.
In this case, you should look for Printful in the Shopify App Store.
When the option to use Printful appears, select it.
It’s just like clicking an app’s icon on your phone to view its full description and pricing structure, which brings up the Printful app’s full description and pricing structure.
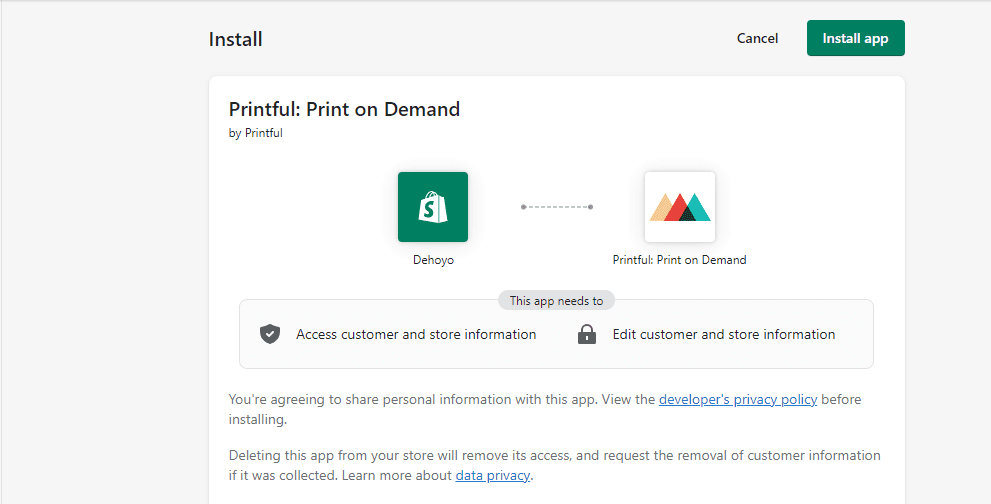
To add it to your Shopify account, click the Add App button.
If you want to return to your Shopify dashboard, where you can install the app, click the Install App button.
This page explains that Printful can access your Shopify account and automatically modify products and orders. These actions are taken only with your knowledge and approval.
You will be directed to Printful after the installation is complete.
If you have an existing account, log in. Otherwise, choose how you’d like to sign up—via Facebook, Apple, Google, or email.
After you’ve signed up, you’ll be taken to Printful’s admin area.
The integration of Printful and Shopify may be signaled via a notification in either service. However, you may need to verify your email address before that happens.
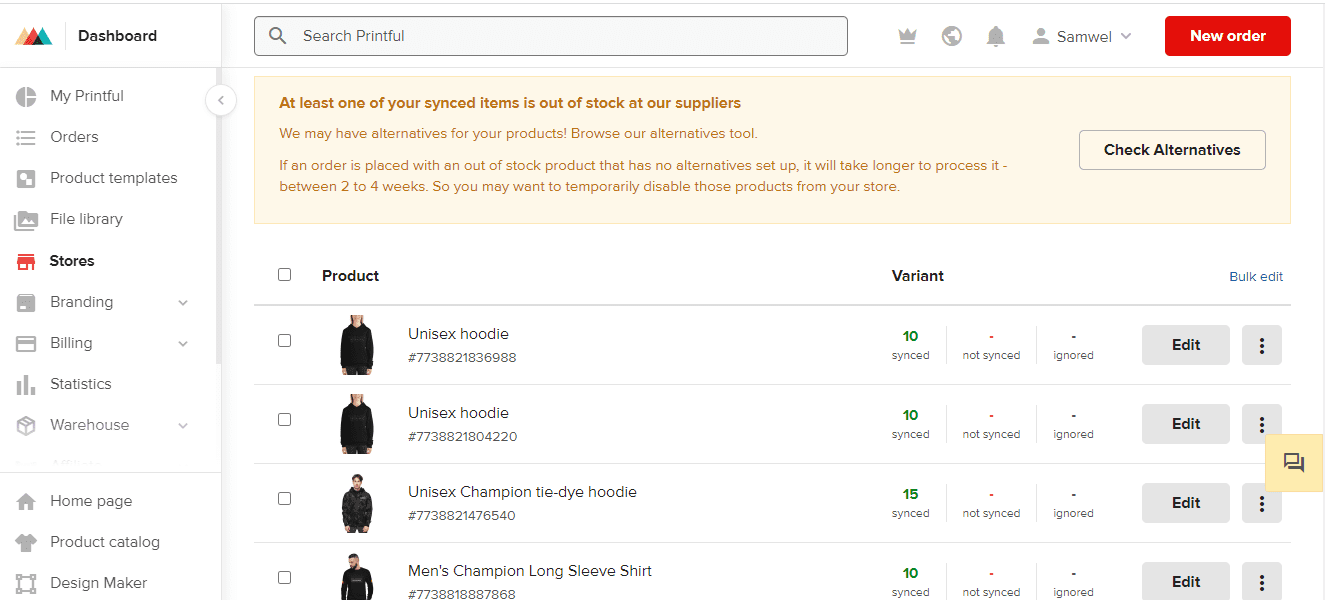
Regardless, you may check to see if your store is live by clicking the Stores link in the main Printful menu. For successful authentication, an Active green indicator should be seen.
You can also check the installation status by returning to your Shopify dashboard and selecting the Apps menu item.
To access Printful from your list of installed programs, you’ll need to scroll down.
Now that you know how to connect Printful with Shopify, you can begin creating print-on-demand products in Printful and selling them in your online store.
Researching a Niche
Selecting a market segment that is in need and that you would be interested in selling to others is crucial when selling POD products.
You should also choose a well-known market for t-shirts, mugs, and other printable items like phone cases and backpacks.
Use our niche-finding guide as a jumping-off point for success. In addition, we provide a guide on how to find specific goods (not just a niche for your store, which is essential when identifying the perfect fit for your POD shop).
The following guidelines are often helpful for finding a profitable niche for print-on-demand shops:
- Research Google Trends and Amazon to find out what people buy. Focus on products with consistent demand or find a profitable market with room for your original printed goods.
- Compile a list of industries where you can find success and where you would love working.
- Use the Google Keyword Planner to determine if optimizing your website for search engines is worthwhile.
- Narrow your niche list to something more manageable, such as a store that sells only one dog breed instead of a general pet store.
- After determining your store’s specialization, you should evaluate whether or not it makes sense to specialize your inventory. For instance, a store selling dog-themed caps, t-shirts, and accessories is more likely to be successful in the long run than one selling dog-themed phone cases, t-shirts, and accessories.
- Conduct a competitor analysis by looking into the various online marketplaces to see who else is selling products that are similar to your own. Can you make it in this market, or is it too saturated?
Choosing the Right Products
Hundreds of printable products are available on Printful, and many are suitable for digital printing, embroidery, or direct-to-garment printing, to name just a few.
Explore the Printful product catalog to learn about what’s offered and think about which items people in your industry could be more likely to purchase during your niche research.
Dog owners may, for instance, enjoy purchasing canine-themed backpacks to store their pet’s snacks and playthings.
Visit Printful and navigate the Product catalog section to see what’s available for the product.
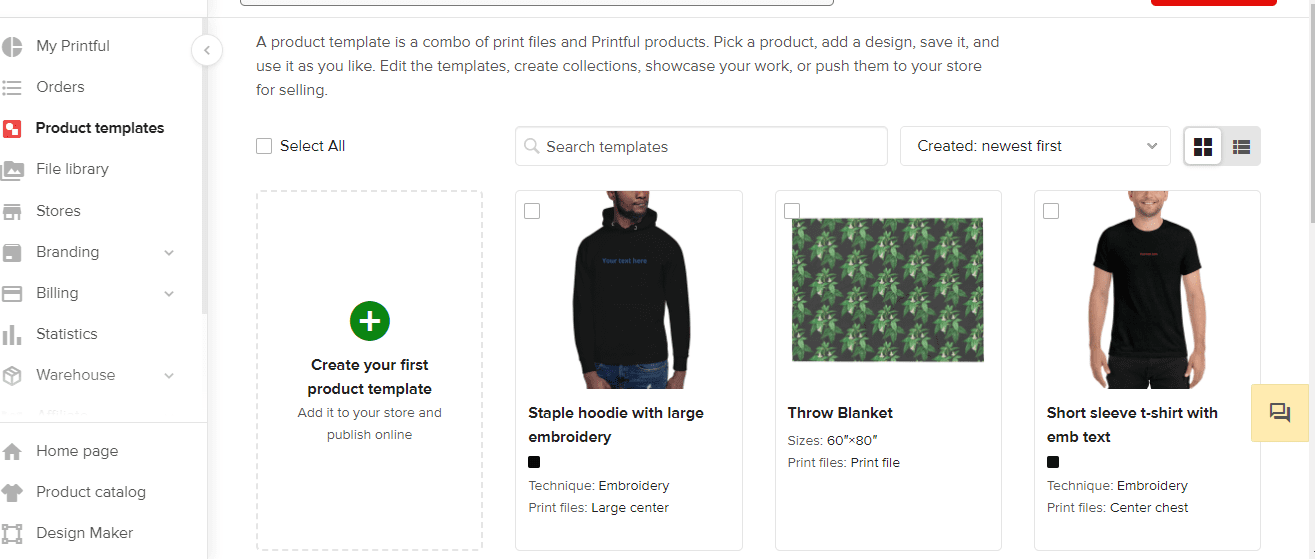
Go to the menu where you can add products to your Shopify store.
To help narrow down the extensive catalog of printable products, a search bar and filter options open up in a new window.
The most popular items are listed first, and a few collections may be popular for classifying items in your store.
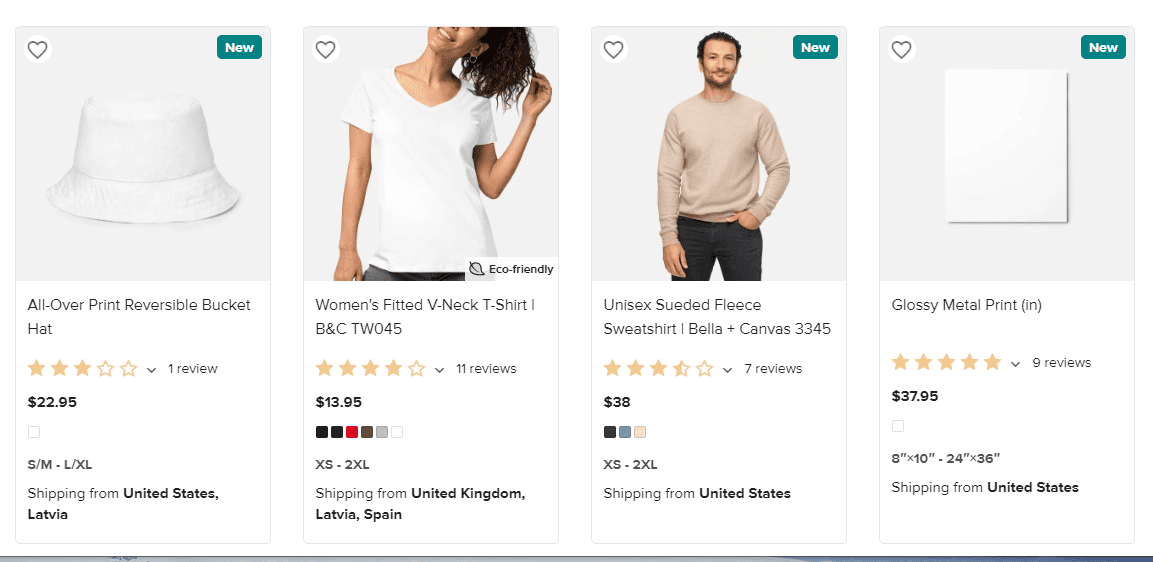
For instance, there is a dedicated section for Men’s Clothing, another for Women’s Clothing, another for Jackets and Hoodies, and so on.
Pillows, stickers, accessories, hats, and bean bags are available farther down the page.
Check out the Printful blog to learn which products are most likely to sell and generate a profit for your business. Although selling bean bag chairs can sound like a lot of fun, I wonder if it pays well.
It’s no secret that the most popular items are the ones that sell to the top of this ranked list.
Since t-shirts are the most profitable item, it’s a good idea to focus on selling just those, to begin with.
If your business is successful, you should branch out into other types of clothes, such as pants or hats. We’ve also noticed a rise in the use of stickers.
Each product category has different styles, colors, and brands, so you must thoroughly research the products you intend to sell.
For instance, there are only a few shirts in the men’s t-shirt department. So if you scroll down to the bottom of each product listing, you’ll find a helpful product for choosing the right one.
The first Bella + Canvas tee costs $12.95 (your product cost, different from what you’ll be selling it for), has hundreds of positive reviews, and comes in a wide variety of color options.
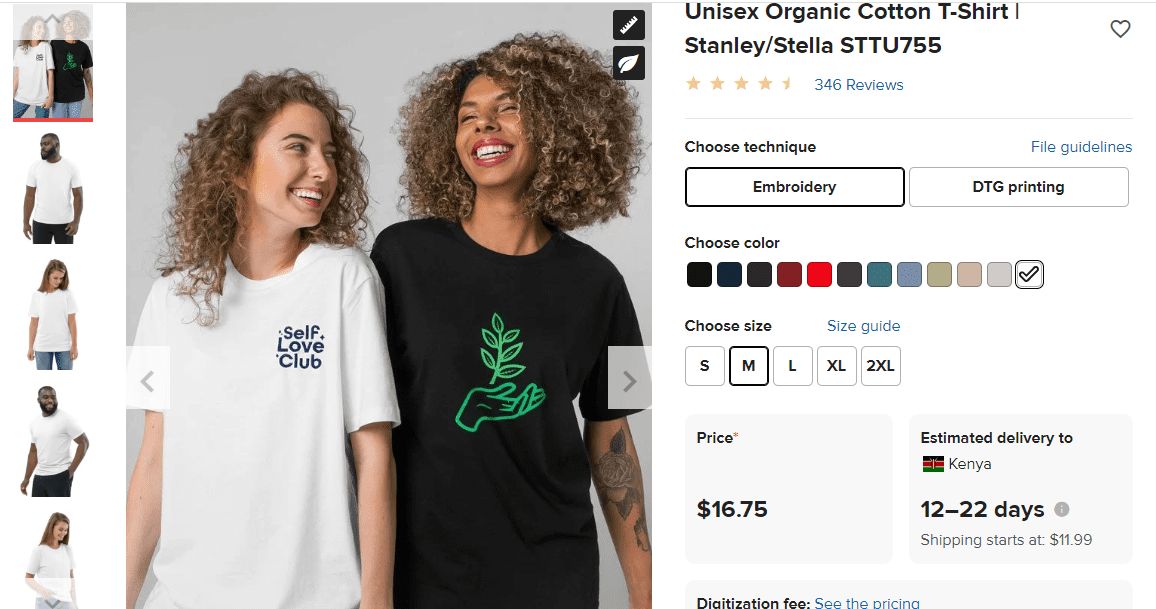
The Gildan shirt is more affordable, but you’re limited to just five colors, most of which are variations of black and white.
It’s recommended that you go with the Bella + Canvas shirt, but you might increase your earnings by selling all of your black and white designs on the Gildan t-shirt.
Nonetheless, we urge you to research by clicking on each product individually.
Read the in-depth reviews to check what people like and dislike about the item.
There’s a Pricing section, too, where you can see how much extra money you’ll need to get this or that. Any additional cost, such as on the sleeves, will increase the cost of a t-shirt beyond that of a plain front design.
To check the product’s details, including its manufacture and dimensions, select the tab labeled “Info.” You’ll find information on details that can make you rethink whether you want to buy the shirt.
Depending on the color, most Bella + Canvas shirts are made from 100% cotton. Unless you’re planning on selling the market’s softest t-shirts, that may be outside your business goals. Cotton t-shirts, however, are popular and durable, which is why many people choose them. Other features, such as a tear-away label and whether or not the sporty or heathered colors are softer with other fabrics, are also displayed.
Designing Products, Making Mockups, and Uploading to Your Store
The Printful dashboard is where you’ll create a mockup and upload your product files, while third-party programs, freelance designers, do-it-yourself efforts, and Printful’s design services can all be used during the first design phase.
Let’s first go over the steps necessary to add a new product to Printful. First, syncing your product with Shopify entails setting an item, applying a design, and uploading the finished product.
To get started, click the right store Add Product button on Printful’s dashboard and click it.
Browse the various categories of products and then pick the one you want to buy.
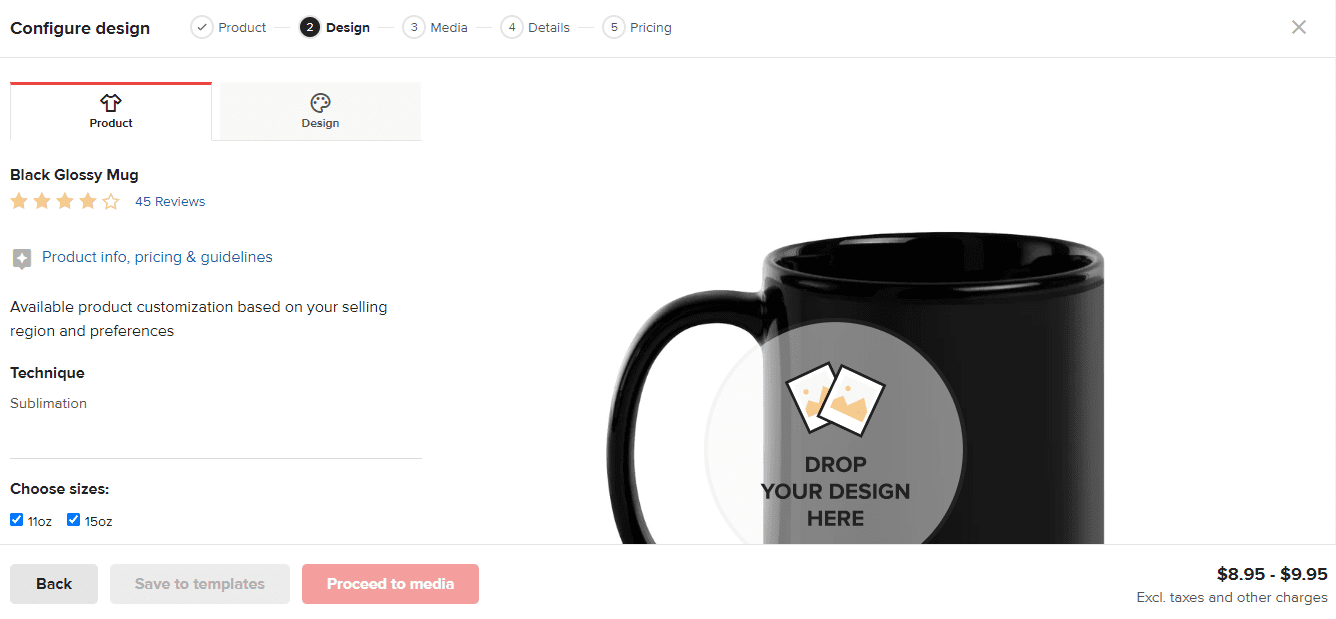
The best-selling Bella + Canvas shirt was chosen for this guide because it is reasonably priced and comes in various colors.
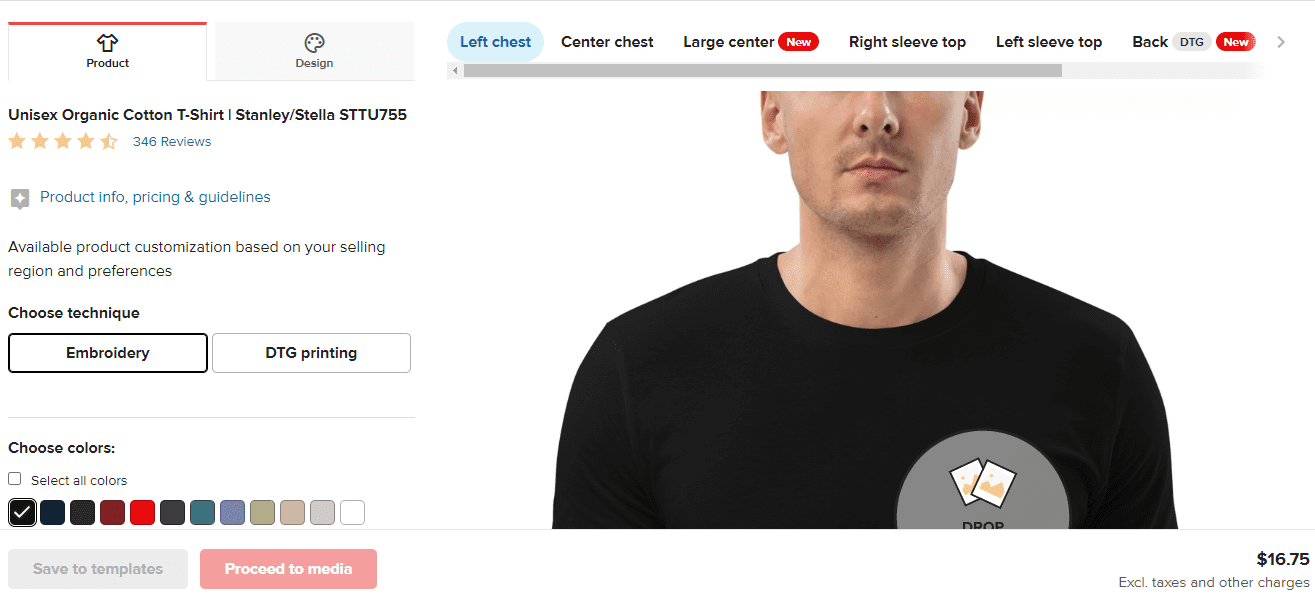
You can configure your chosen page’s design and drop it where it says “Drop Design Here” in the mockup.
It’s a media uploader, so you may use it to upload your design or select one of Printful’s pre-made templates.
Here, we’ll use one of Printful’s free sample designs as an illustration. If you find a design you like, click it to Printful by clicking on it.
This is because Printful affects the preview model to include the design. You can change the design however you like by using the resizing and clicking handles.
There are various add-ons accessible from the left side of the designer page. You may incorporate text, clipart, or a quickly crafted layout. A premium image gallery can be viewed and purchased with a button.
Adjusting the rotation, alignment, and amount of cropping can significantly impact the final appearance of your design.
Printful allows you to print on many sides of some products. For instance, a T-back, shirt label, and sleeve tabs allow for the placement of a customized design.
The Drop Design Here button can be used again to add an image to that section of the shirt.
As your pricing increases to accommodate new products, keeping a close eye on your spending is essential.
Once I accounted for the sleeve design, the price range naturally expanded.
We also recommend you pick various shirt colors and sizes in your shop. Pick your preferred printing approach, too.
You should click away from the Design tab and onto the Product tab to access the color and size selections.
To proceed, please hit the Next to Media button.
On the following page, you’ll be prompted to choose product mockups. Printful offers a wide variety of mockups, where your design is digitally superimposed onto a model or a photograph to simulate its final appearance.
Feel free to browse the available mockups. After that, pick the one that best fits your business. It’s important to remember that the mockups featured on Printful’s site are standard. However, having product mockups on your site is a good idea because they increase sales. Further, you save yourself the hassle and time of organizing a photo shoot for your online store’s product listings.
Next, a window will appear where you may change the product’s name, description, and sizing information.
What gets uploaded to your online store depends on the values entered in these fields. While Printful does include some passable material, we suggest reworking everything to align your branding better and make for a more pleasant reading experience.
Tags, collections, and free shipping indicators are available on the pop-up.
When ready, please click the Proceed to Pricing button.
On Printful, you can access a pricing calculator that details your profit margin and wholesale cost per unit.
When you’ve calculated all your costs for making one shirt, you may enter the item of profit you want to make on it. By referring to the final column, you may check how much extra money you’d make by increasing the Printful price by a specific dollar amount or percentage.
Please be sure to include pricing for all product sizes. Bigger items tend to be priced slightly higher because of their rarity and difficulty of transport.
Following that, hit the store’s submit button.
All the information about your products, including prices, mockups, and descriptions, will be updated on your Shopify storefront.
When it’s finished, head to your store’s settings page to look at the synced products.
Visit your Shopify store to see the latest addition to the Products section.
Take a look at the product on the front end of your store. Look for grammatical errors and omissions, and ask yourself if you’re satisfied with the page’s aesthetics.
One pressing issue is how to generate or acquire marketable designs.
When looking for where to get your designs from, you have three choices:
• Invest in a t-shirt design library or stock vector images.
• Draw up your designs.
• Get yourself a designer!
The design of your product can be improved in many ways, but one of the simplest is to hire a designer. On the other hand, I’ve had designs when I spent way more than I had planned but was still disappointed. It’s one of the more pricey options, but checking out portfolios from agencies and freelancers can help you save money and avoid working with subpar designers.
Some suggested resources for finding freelance designers or design firms specializing in creating unique projects are below.
• Printful employs in-house designers to hire.
• You may find designer markets like PeoplePerHour, Upwork, and Fiverr. Despite the low cost of many services, finding competent professionals may prove challenging.
• Penji operates like an agency, but its design services are offered on a subscription basis: for about $400 per month, clients have access to an infinite number of new designs. The findings are encouraging, and this approach represents significant cost savings if you anticipate selling many designs or maintaining a close working relationship with the Penji group.
• You can find talented designers who fit your brand’s aesthetic on DeviantArt and other similar sites.
• 99designs is a marketplace where you can check out the work of many designers and hold competitions to find the one who can make the most eye-catching and functional designs for your business.
If you want to save money, you may always make up the designs yourself. Only those with prior experience with Adobe Creative Suite programs like Photoshop, Illustrator, and InDesign should attempt to create a design from scratch. In the absence of formal training, you should refrain from attempting to learn the skills necessary to become a professional designer. You can reflect to sell any of your creations.
Yet, if you are familiar with the design and are eager to learn, you can use one of the many visual design tools geared toward helping novices create professional-looking work. Among our most-used web-based design resources are:
• PlaceIt is a fantastic subscription service for creating gorgeous product designs and mockups. Our first advice for all Printful goods vendors is to do this. The corporation was formed to handle precisely such an emergency.
• Canva — Use the many pre-made layouts for t-shirts and other goods. You can easily create professional-looking designs with Canva drag-and-drop editor and then share them with others or have them printed directly from the service. We advise you to try out the trial version to determine whether it meets your needs.
Last but not least, you can pay for a database of t-shirt designs or a design of vector or stock images for a subscription. This method aims to track down complete works that the designers are willing to part with at reduced costs. For example, you can make your product designs by using stock photos or vectors or using them to enhance the text you add to a t-shirt, mug, or backpack.
Some databases to look into include:
- Vecteezy – One can sign up for free or pay a small fee to access the premium area, which has all the best features.
- TshirtFactory – Another prepackaged vector merch and t-shirt collection, where you pay for a themed bundle to utilize on many of your products.
- Getty Images –As a Printful user, you can access a portion of the Getty Images library. Only use it for stock photos and vectors.
- FreeVector – An alternate option to Vecteezy, which may offer more variety in available designs. If you need fresh vectors, you should look no further than Vecteezy and FreeVector.
- Designous – Designous provides print-ready t-shirt and merchandise designs that are editable and ready to be imported to Printful.
Ordering Test Items
We’ve established that you may place a trial order before making a product live on your Shopify store and making it available for purchase by customers.
Remember this rule of thumb regarding free samples: A product sample is always a good use of money and time. Instead, send yourself a sample of everything you’re going to be selling. The last thing you need is a slew of returns or chargebacks from clients because your design didn’t print as expected on a particular hue.
Now that we know what to expect, let’s look at the process you’ll go through to order a product sample from Printful and have it delivered to your door.
To kick things off, here are some critical considerations concerning your product samples:
- Each new customer is allowed a monthly sample order.
- Increase the maximum number of sample orders that can be placed using Printful. The number of sales is a determining factor.
- You will get the sample orders the same way your customers would. You want your brand to be taken as seriously as possible; therefore, it’s necessary to look over every detail, from the box it came into, the return address printed on the product, and the insert included with the purchase.
- Samples of products are shipped for free to some areas.
- As many as three samples may be taken from any given order.
- In the event of egregious policy violations, user accounts will be disabled.
- Printful offers a discount of 20% off the base price (the cost of the item, not the price you charge for it in your store) for all sample orders.
Go to Printful’s website and select New Order to place a test order.
The New Order button can be found in the upper right corner of the screen, but it also appears in other products, such as the Stores tab and the product editor.
A window will pop up, asking if you want to create a Basic Order or a Sample Order. A basic order is best if a customer’s order must be entered manually. If the sample size constraints are stifling your research, you can use them to obtain additional samples.
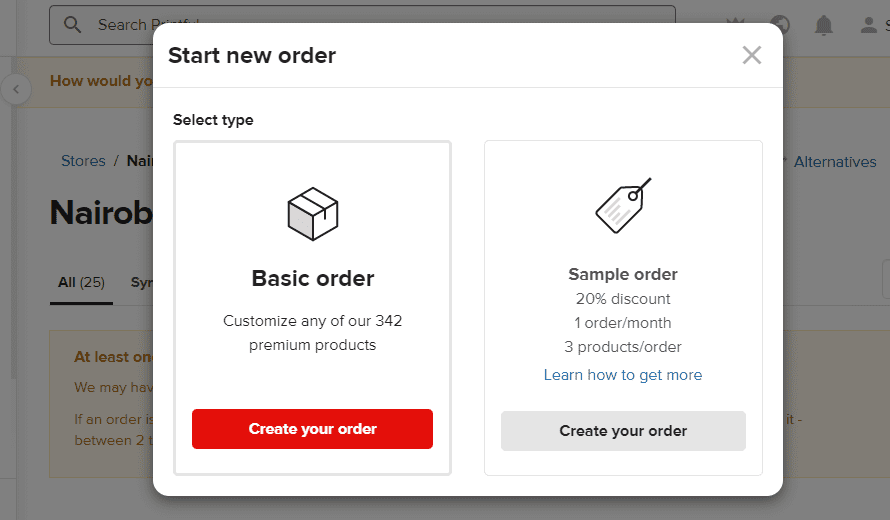
However, since you save 20% immediately on sample orders, that’s where we recommend investing your initial funds. As was previously mentioned, you can only place one order per month, and that order can only contain a maximum of three different products. With more significant revenue, those hats can be raised.
To get started, click the button that says “Create Your Order.”
You can only add three products to your order, and Printful explains why.
After clicking the Add Product button, you can select which items to include in the trial order.
The subsequent window to appear will prompt you to select a product variation. So, say you designed a shirt that comes in a variety of sizes and colors. So they need your help deciding which products to send as free samples.
Choose a size that will work for you as a general rule. You should order a shirt in a size that fits you. It’s essential to order a painting in a size that fits well in your space. After all, you’re buying it for your personal use.
Think about which possible variants you need clarification on. In this case, there may be better choices than the light red shirt for the design with red accents. If you have any doubts, it’s best to get a sample first.
To add a variant to the sample order, click the corresponding Choose button on this page.
After then, consider the costs and quantities available. A 20% discount will automatically apply to your sample order, and you’ll see both the regular product and the discounted price.
If everything checks out, you can proceed to ship.
On the following page, there’s a space where you can add dummy addresses for sample mailings. Send out samples within your company by using this module. You can skip to the “Name and Contact Information” section if you’re the only one.
Most of your sample shipping costs will be determined by the information you provide in the address fields.
To calculate shipping charges, scroll down and hit the button.
In the new window, you’ll find shipping options. Free shipping is available if you are in one of the qualifying areas. In any case, the Flat Rate shipping option is the most cost-effective choice.
Make sure you check the total price for your sample twice. Despite the addition of tax, the final price should be lower than what you’d pay without the discount.
Select the Continue to Review button.
The location from which your order will be shipped can be shown on this page. In addition, you can change the shipping address in your main profile and shipping settings.
Either add funds to your Printful wallet (recommended for future orders) or enter your credit card details to pay for the sample.
Final step: confirm the amount and proceed to the secure payment page by clicking the Pay Now button.
This begins processing your sample order, notifies you through email when it ships and allows you to monitor its progress until it arrives at your door.
The value of ordering samples before selling a POD store with Printful and Shopify cannot be overstated. Shipping out products that have yet to be thoroughly inspected can cause many issues.
While Printful performs its quality checks, issues with printing quality (such as a fuzzy image or an image that doesn’t print properly on specific colors) are typically the result of a human mistake in the designer’s play.
It’s a negligible cost to satisfy your consumers and prevent unnecessary returns or chargebacks (which could cost you more money than the actual product). As a process of your education on using Printful with Shopify, it’s smart to do so.
Branding Your store
The focus should once again be on your Shopify store. While you may have already synced certain products between Shopify and Printful and added them to a collection, making necessary aesthetic adjustments to your online store is vital.
For example, a logo in earth tones like green and brown might be appropriate to advertise phone cases designed for use in the great outdoors. However, a store selling products with a parenting theme might only use cutesy fonts and pastel colors.
Thankfully, Shopify simplifies the process of making these modifications.
We re-examine the following basic settings as we modify the retail outlet once more:
- Your logo.
- Typography.
- The primary website colors.
- Store and domain name.
- All multimedia elements.
Some of the earlier sections of this article explain how to get a domain name and upload a logo. To control your online persona, follow those instructions. For example, a tutorial on using the Hatchful Logo Builder to create your own Shopify logo is also available.
Make that work in the style of a logo or as a guide to deciding on a specific aesthetic direction. The incorporation of a favicon is also crucial for branding; thus, it’s recommended that you research the topic.
Shopify’s theme editor is where you’ll make changes to the theme itself, including the website’s primary color scheme.
To do this, open the Shopify dashboard and navigate to Online Store > Themes > Customize.
The theme’s design components are shown as content items in a left-hand item.
The Theme Settings, though, are where you’ll find the options for making global changes.
Please select the theme from the drop-down menu in the lower-left corner to adjust it.
Go to the option labeled “Colors,” and you may change every color on your site at once.
Several options for customization exist. First, try out all of them to see if you can make any adjustments that will make them better fit your brand, while some may not require any changes.
When we change the visual editor, for instance, we instantly see the result of the new Background color.
You’re welcome to explore all these color choices for headings, text, backgrounds, and menus.
Step back and click the Typography button to view font options.
There may be slight variations between Shopify themes, but you can generally modify the typefaces used for titles and body copy.
Look at the heading text on the right of the image below for an instant illustration.
You can see the consequences instantly when you change the visual editor, such as making fonts. You’ll see that we’ve switched from the more common Helvetica font to the more elegant Garamond.
As a last step in establishing your brand identity, you must verify the integrity of all media components already hosted on your website.
Does the theme’s demo content need to be updated to suit your business better? Some of the media you’ve already uploaded could look better in its present form.
Please click on them to make the media-related content modules look more polished and up-to-date. For example, if you have new product designs arriving from Printful, you may need to modify the images or videos in the module to match what you’re selling.
Pricing the Products
Setting a competitive price for your product determines your potential profit and the number of buyers who will consider purchasing. If the price of an item is too high, it could end in a decline in sales. However, you will only make as much money if you sell something at a reasonable price.
Profit margin configuration is covered in this section of the Shopify and Printful guide (which then syncs with Shopify, along with tips on formulating your pricing strategy overall).
For starters, it’s crucial to learn the ins and outs of Printful’s pricing structure and the tools at your disposal for calculating your costs and potential profits.
Printful’s Payments Guide is a great starting point because it has a profit calculator for several top-selling products. Enter hypothetical amounts and prices into the calculator’s input fields. The profit from sales is calculated after all costs have been deducted.
When you create a new product in Printful and set its specifications, the platform’s accurate pricing calculator kicks in.
When you search for a new product from within the Printful dashboard, that’s the first time you’ll see prices or the fee Printful requires in exchange for the right to sell one of its products.
As you can see, it is possible to look at several hats and evaluate their costs, features, and user ratings, among other colors.
As the going rate for hats is around $15, we need to come up with a price above that range without being so high as to turn off potential buyers. After that initial $15, all additional proceeds generated will be deemed store profit.
When you are through customizing the product and entering the relevant information, go to the next step, which is to view the price.
The page where you entered your costs and expected returns appears.
It functions similarly to the mock calculator on Printful’s website, displaying the Printful price (or your cost for that item), the Retail Price (a suggested price and a field to type in your retail price), and the Profit (calculated based on your retail pricing).
A fixed dollar amount or a certain percentage can also increase the Printful Price. You can set your desired profit margin from the outset, whether it’s 30% for every product you make or only $10. Setting prices for each item and maintaining a consistent percentage margin is recommended.
The big question is, what should we ask (the right price) for this?
We have some ideas and leads to help you with that challenging question, though.
- A high-quality item may fail to sell if the asking price is too high.
- Printful has suggested selling prices for all its products and offers monthly discounts of up to 9% based on your sales volume. If you’re unsure where to begin, that’s a great place.
- No matter how low you price it, no one will buy a product with low demand or a subpar design.
- And here are some pointers on how to add up all your expenses to make sure your profit margins are enough:
- Do not forget to factor in advertising and website maintenance prices.
- Design costs, subscription fees, marketing, and other startup costs must be factored into your expected return.
- If you are charging for shipping, make that fact extremely obvious. One of the main reasons shoppers abandon their carts is the shipping cost.
- Including the cost of shipping in your product prices is something to consider if offering free shipping.
Publish Legal and Informational Pages
When integrating Printful with Shopify, several legal regulations must be created. That includes both the physical location of your company and the locations to which you will be sending products.
This is why it is crucial to have the following legal and informational pages on your site:
- Privacy policy
- Shipping Policy
- Terms of service
This is why it is crucial to have the following legal and informational pages on your site:
Shopify’s Legal Page Builder is a godsend, as it instantly creates legally compliant copies for your site’s disclaimers and other legal notices.
To tailor a template to your business, you must apply the appropriate one and make the necessary adjustments. Shopify will also add your company name and customer support email based on the information you provide in the Shopify settings.
In the Shopify admin, these pages can be created by clicking Settings > Legal.
Four fields exist for the required disclaimers and other legal and informative pages. For example, you can manually enter your policies or use Shopify’s suggested language by clicking the Replace With Template button.
If you need a sample of a Refund Policy, for instance, you can select one and have it automatically filled in.
In terms of privacy, nothing has changed, click the Replace With Template button to see the suggestions.
They also provide a similar tool for their TOS.
We stress that you review these guidelines and update them as needed. The last thing you need is confusion about your legal paperwork.
The Shipping Policy field is the last one. Shopify doesn’t provide a pre-made theme for this because it varies significantly amongst businesses.
Instead, refer to Printful’s Shipping page to collect data and paste it into your Shipping Policy page. Fill in the specifics, such as shipping schedules, costs, and speeds to various destinations and types of products.
The final step is to link these pages to your clientele.
A link to your site’s legal information page should be included in the footer. Do not include them as mandatory items on your main menu. Instead, add links to your Shipping and Returns policy on the product pages. These are standard in several Shopify templates.
Go to Online Store > Navigation in your Shopify dashboard and add “Legal” as a new section to your menu.
If you want to relocate these links to the legal pages, use the Footer menu or make a new menu.
Remember that you shouldn’t place any links to your legal pages on your site’s navigation bar. That would make things harder for customers to find what they’re looking for, and the main menu should be used to guide them to specific product pages and category listings.
To include an item in the menu, select it and click the corresponding button.
When you click the Link field, a menu of related, preexisting pages and links will appear for your perusal.
Find the button labeled “Policies” by navigating through the available options.
Existing Policy pages will be displayed here.
For instance, the Privacy, Refund, and Terms of Service pages can all be included in the same footer navigation.
As you add each one, it will automatically appear in the footer menu.
If you want to see the modifications you’ve made to the front end of your website, you must click the Save Menu button.
Now, navigate to the bottom of your website’s front end, where the footer is located.
Those three navigation options now appear in the footer menu.
You should also test the links by clicking them to check how they work.
Return to Shopify’s Legal section and correct any mistakes if you find them.
As you set up your POD shop, cover these additional legal considerations:
- Printful asks that you submit legal and tax information before selling.
- To begin selling on Printful, you must gather the necessary legal and tax information and comply with local laws.
- You should see a tax expert to learn what fees you should implement to compensate for your tax obligations.
Billing and Shipping
When you set up a Printful Print On Demand store on Shopify, you can accept payments directly from customers within the Shopify interface. The average rate for processing a credit card payment through a payment gateway is 2.9% plus $0.30. Your funds will be used for the rest.
A further aspect of billing remains open. To sum up, the Shopify platform only covers your Printful fee upon a sale. So that Printful may charge you for all of these costs, you must add up a payment method.
Okay, so let’s simplify that:
- Customers can make purchases and make payments directly in your Shopify store.
- The credit card processing service takes a cut and sends you the rest.
- Third, Printful only receives that money after a while.
- Any time you make a sale with Printful, your chosen payment method (or Printful wallet) will be debited.
The Printful wallet must always have enough funds to cover the base product costs while using both the Printful and Shopify dashboards.
Alternatively, you can have Printful deduct payments from a credit card or bank account that you provide.
You may access your payment history with Printful on the Payments page and even download reports. For example, you may use Shopify’s reporting capabilities to double-check your books once a month or once a quarter to ensure everything adds up and your revenue covers your expenditures.
We’ve already covered the details of setting up a shipping page on your site. That’s crucial to keeping your customers in the loop and setting reasonable expectations.
Here’s some good news: Printful has a history of reliably meeting promised delivery deadlines. However, because of the print-on-demand nature of the business, shipping times are more significant than they would be if the product were being shipped directly from a warehouse.
When getting started with Printful with Shopify, here are some things to consider regarding shipping:
• It typically takes Printful between two and seven days to print and ship an order. The typical turnaround time for an item is around 2 days, but remember that this is only preparation time before the item is shipped.
• Rates for shipping are calculated based on the customer’s location, the item’s category, and the quantity being shipped. When shipping to the United States, a shirt costs $3.99, but when shipped to Europe, it costs $4.39. The price per shirt increased by around $1 for each additional shirt ordered. The products themselves are critical. The US domestic shipping fee for a hoodie is $6.50.
• Typically, orders placed with Printful take four days to arrive at their destination. Consider this in conjunction with the time needed for printing and shipping.
• Printful’s warehousing and fulfillment capabilities enable same-day shipping for finished goods,
• and the company’s Shopify interface lets customers see shipping charges in real time while they shop.
Shipping products and timeframes may influence your choice of what to offer in the first place. For instance, for almost all countries that Printful ships to, shipping jewelry costs nothing. That’s an exciting perk to consider when choosing a jeweler.
However, shipping prices of $29.95 per product in the USA (and significantly higher shipping rates when shipped to other countries) make some of the larger framed posters less appealing. Customers may not appreciate this, but they should realize that a large poster in a frame will be more expensive to ship.
Customizing Packing Slips and Return Labels
All items shipped through Printful come with a packing slip. Each packing slip may be customized with your company’s logo and essential details like your support contact information at no additional cost.
Packing slips double as receipts, so your clients can easily keep track of what they bought and how much it cost.
Printful’s Settings > Packing Slip is where you can change the shipping labels.
Include your company’s logo (in black and white), an email address, a phone number (optional), a note to the customer, and a link to your website.
Just hit the “Save” button.
You can click the Preview button to see how the packing slip will print out.
The printed packing slip includes all the pertinent receipt information, including the return address (discussed below), purchased products, a barcode for scanning, and your company logo.
It’s also a great chance to send a humorous note to your customers, inviting them to check out your social media or return to utilize a discount offer. For example, if you’d like to include a discount code on your packing slip, remember that Shopify doesn’t support links, so you’ll have to create the code there and write out the URL, making sure it’s brief and precise.
All shipping and package slips from Printful include a return address if a customer returns an item to the company.
By default, the Printful warehousing center closest to your customer’s location will be listed as the return address. You can rest assured that Printful will collect your returned items and either reuse them for a future order or responsibly dispose of them.
That option is available if you’d rather have your returns shipped to your address instead of the default North Carolina location.
Receiving and Fulfilling Orders
Printful has numerous options for fulfillment facilities; some are selected automatically based on the shipping region, while others can be changed based on your preferences.
Select Settings > Stores > Orders in Printful’s navigation menu to configure your fulfillment centers.
Currently (because of Covid), Printful orders are being shipped from alternative locations worldwide. For this reason, your options for warehouses to store your goods are limited. But, on the other hand, this part typically shows a few options.
Find the Order Import Settings by scrolling down the page.
To tell Printful how to begin the printing and shipping process, you must adjust these settings. For example, you could verify each order individually. However, you may configure your Shopify store so that orders are automatically confirmed as they are placed.
Even though automated order processing is the ideal option, it is still essential to check both orders. Instead, it returns to ensure that no fraudulent or phony orders are being processed. Therefore, choosing manual order confirmation allows you to reject orders that appear to be fraudulent.
Also, investigate the Product Alternatives settings.
In summary, selecting this box notifies Printful that you agree to swap a similar replacement product in the item that the print you ordered is no longer available. You may be confident that Printful won’t accidentally ship a woman’s shirt to you when you order a man’s. When presenting you with new options, they only offer variations nearly identical to the one you previously selected. Typically, they will go for a generic brand of the same size and color.
Last but not least, consider setting up your shipping alerts so that you are aware of both the receipt of an order and its subsequent shipment.
In the Printful dashboard, you can modify these settings by clicking Settings > Notifications.
A wide variety of choices for alerting you about orders and products become available when you click the appropriate tab.
Most are selected automatically, but you may uncheck them to make room for more critical notifications, such as Shipments or Products. Besides checking your inbox for emails, you may also get notified via the Printful dashboard or app.
If an order comes in, you’ll get a notification right away. Printful and Shopify keep track of sales so you can check on your processed orders there. Even if you have Printful set to fulfill orders automatically, you may still need to go in and do it manually.
Marketing Printful Products
While developing a marketing plan for physical products may sound complicated, doing so with Shopify is a breeze. Printful provides a few marketing tools, but they have great mockups you can use in your social media, email, and website campaigns.
On the other hand, Shopify is your one-stop marketing for building a comprehensive online advertising and marketing plan that includes everything from social media to email newsletters.
Shopify’s Marketing submenu is where you should start if you’re unfamiliar with the platform.
Multiple email marketing apps, Snapchat Ads, and Microsoft Advertising are just a few of the many that have become apparent.
The Shopify App Store provides a wide variety of marketing apps that may be easily installed.
However, the Create Campaign button is convenient, as it comes with several good prebuilt campaigns and suggestions tailored to the most popular shopping platforms and websites.
To begin, select View Campaign Templates or click the Create Campaign button. Each of these links will bring up a separate window from which you can start your marketing campaign. Plus, your products will be in step with the marketing initiatives, making it easier to provide inbound links.
Ads, emails, social media, SMS, and other campaigns can all be launched from their respective tabs.
Under the Email option, you’ll find a button to initiate the production of email newsletters for your clients, complete with active links to your website and its product pages. Alternatively, you can install a third-party email marketing app, which will likely offer more functionality.
A “Social Post” tab can be found in the “Marketing” section. Although Facebook is the default platform for social sharing, it is also possible to integrate your online shop with other platforms like Twitter and Pinterest.
Shopify provides an almost infinite number of options for promoting your products. Shopify has a dedicated Marketing area, but the App Store is where you’ll find the tools to obtain reviews, create loyalty programs, and manage email marketing campaigns for all your products. In addition, they provide several apps that can help you list your products on popular e-commerce sites like Google and Microsoft.
Finally, Shopify has multiple settings for optimizing your site for search engines, so you should make those if you want to see an increase in organic traffic.
Selling on Other Marketplaces
You may sell on multiple channels when you open a POD store with Printful and Shopify. Although setting up a Shopify store is simple, you should promote it in places where your target audience spends time on the internet.
Websites like Amazon and eBay and social media platforms like Facebook are examples of such venues.
So, if you wish to sell in additional markets, you should connect Shopify to those platforms.
Go to the Shopify dashboard and navigate the Sales Channels menu to make this happen. You may add as many different channels of distribution as you like by clicking the “+” icon. The app store will have even more suggestions, but the ones provided here should get you started.
Several different sales channels are presented here, demonstrating the default availability of several options.
Feel free to link a Buy Button on your blog or website that directs places to your eBay or Etsy sale. Options to sell on Facebook Messenger and Google Shopping are also provided.
It’s been established that you can always access the App Store via the corresponding link (App Store link), allowing you to click for alternative channel apps.
They even have an app category in the App Store specifically for selling things.
Using Facebook as a sales channel is possible if you set up a Facebook store and connect it to your Shopify inventory. Even Amazon has its app! Apple, Google, TikTok, and many others are just the beginning.
Once a new channel is created, it will appear in the submenu of the Sales Channels option. You can take them out and add them whenever you need to.
Remember that different sales channels require different channel procedures. You must launch a verified and authorized Amazon store to start selling on Amazon. After that, you can begin syncing products and linking stores on your Shopify dashboard. eBay, Google, and Facebook are all in the same boat. So when you’re ready to start using Printful with Shopify, you’ll need to go through the necessary steps to set up both platforms.
Customer Support
You may be familiar with the concept of a “dropshipping store” or “dropshipping.” There are benefits (low initial costs for launching an online store) and drawbacks (low inventory turns) to using a dropshipping service (shipping takes a long time). Technically speaking, Printful is a dropshipping solution because it handles order fulfillment and shipping for you.
As a POD system, however, this has several advantages over standard dropshipping. First, printful’s ability to operate its warehouses and accept returns is its main selling item.
This means you may be okay with having customers make returns at your house or workplace.
However, you still have responsibilities in customer service, such as responding to inquiries regarding purchases, refunds, and product details.
Managing customer service is a breeze when you follow our guidance when learning how to integrate Printful with Shopify:
- Include Printful’s address on the return label at all times. In this manner, you won’t have to worry about taking in the returns.
- If you want to know a lot about a product, you should order some samples. If you have a question about a specific size or brand, reference sheets and a link to the Printful product specs pages are handy to have on hand.
- Create a page dedicated to frequently asked questions (FAQs) and post the compiled list. As the list of items increases, compile them into a database where customers can go to find solutions.
- Install a chat widget on your Shopify store to assist customers in real-time.
- Make email contact easy by providing a dedicated form for it. Having a phone number for people to contact would be convenient, but that’s not always possible when you’re just getting started.
- Product charts, shipping timelines, and return policies should all be prominently shown on product pages.
Read Also:
- Is Dropshipping Legal? (Documents Required To Dropship 2023)
- Is It Profitable To Dropship? (10 Things You Must Know 2023)
- DSers Review: The Dropshipping App That Replaced Oberlo 2023
- 10 Dropshipping FAQs Every Dropshipper Asks 2023
- Can Dropshipping Make You Rich (The Truth 2023)
Final Thoughts
Integrating Shopify and Printful POD creates a fantastic ecommerce ecosystem, from creating products to fulfilling orders and supporting customers.
We know you have other options, such as Teespring, WooCommerce, and BigCommerce, but the Shopify and Printful integration is so smooth that you shouldn’t even recommend switching.
You can utilize the mockup generator to design your products, and those products will only go to print once and when a customer purchases from your site. That eliminates the need for product storage, streamlines shipping, and allows for sufficient quality control for those who order samples before mass distribution. Printful also provides a fair pricing structure and product reviews to help you pick the best products.
We hope that your experience with Printful and Shopify POD goes smoothly. If you have any queries about selling Printful with Shopify for print-on-demand sales, please let us know in the comments.
Start Shopify For Only $1 A Month
Sign Up Now and Get your first 1st month for only $1 with 3 days free trial.

Sharing this information with others can make a huge difference. You may ask why.
Well, the truth is, my main aim is to provide the best information about drop shipping for both beginners and experienced dropshippers.
And I plan to continue doing so for as long as I can.
I would also like to thank those who support my work by reading and sharing my content.
Trust me, when you take your time to share, it will greatly help me and others who need this information.
Here are some great suggestions:
- Pin it
- Share it on another blog.
- Share on Facebook (Share it with friends and even on Facebook groups)
- Tweet it
- Stumble it
This will only take a few seconds of your time, and I would appreciate it.
I appreciate you a lot. Thank you!
Join my Shopify dropshipping group mastermind and follow my blog to learn more about Shopify tips, dropshipping guides, tricks and checklists, and e-commerce in general.
If you enjoyed and learned something from this post, you can get me updates for free!
I send out email newsletters about new blog posts, tips, and tricks to help you grow your dropshipping business, new YouTube videos to give you more insights into the e-commerce market, and much more.
Click here to Join My Facebook Mastermind Group
